
Introduction
I am developing a new application for traditional muzzleloader shooters; a range log. It is a long way from being finished, but I would like to invite your feedback. Muzzleloader shooting is very specialized and needs a range log geared to these special requirements. To address those needs, the application is currently divided into two parts; a listing of your firearms, and the actual range log. The firearms listing is referenced in the log and if you fill out all the information, the initial front sight height is calculated for you. I hope this will be a nice little bonus for sight-ins.
A New Web Application
The Muzzleloader Range Log is currently a web application only, so you will have to store your all your information online. Your data is secured by your e-mail address and an encrypted password which you provide when you signup the first time you run the application. I recently implemented a facility whereby you can download all your firearm and log data to Excel spreadsheets so that you can have an offline copy.
Future Development Plans
In the mean time, give the application a look and let me know what you think by leaving a comment. My plans are to make this into a Progressive Web Application that you can install on your mobile device and store your data temporarily offline. This will allow you to record your data at the range, if it lacks good internet access, and then upload the data to the cloud once you have a good connection again. Eventually, I would like to move this to a strictly a mobile app running under either IOS or Android or both, but that is a long way off. I am also considering adding an analytics section to the application that summarizes your shot information and load performance. Your suggestions in this area are appreciated.
A Mobile Application
This application is designed to work well with mobile devices as long as you have good internet access or a strong phone signal. Actually, I did the initial screen design for an iPhone 12 Pro but it should work well with most phones and all tablets. Of course, it will work just fine on laptops too.
Instructions for Use
Run the Application
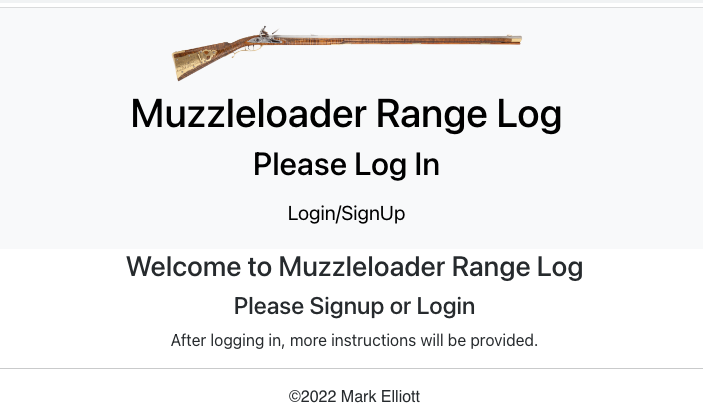
Now, for some instructions. Click on the image below to be taken to that login/signup screen at https://range.markelliottva.com.
SignUp / Login
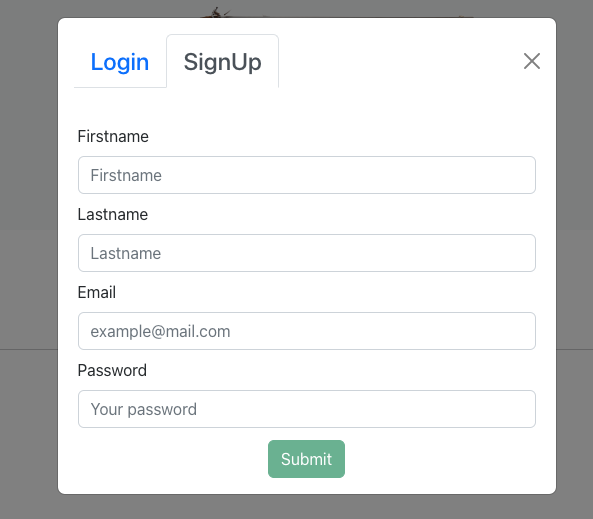
Click on Login/SignUp to get the screen below. Then click on the SignUp tab to signup. On all subsequent visits to the application, you will click on the Login tab and provide the e-mail address and password you provided at SignUp.
Firearms
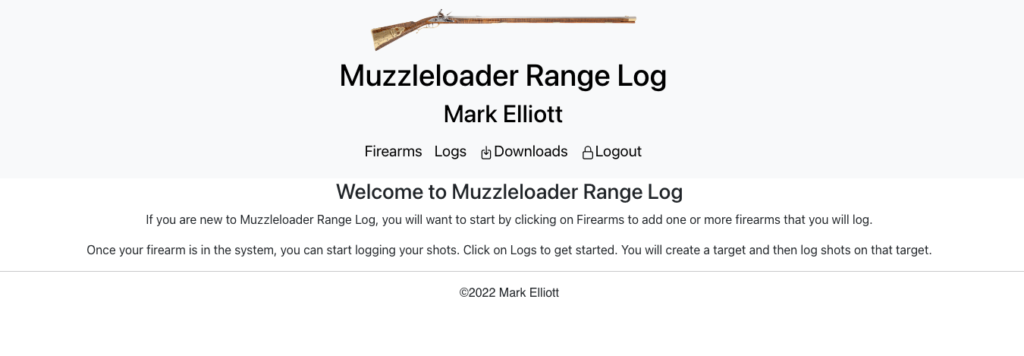
Next, you will be presented with the main screen showing the Firearms, Logs, and Logout menu options.
Add a Firearm
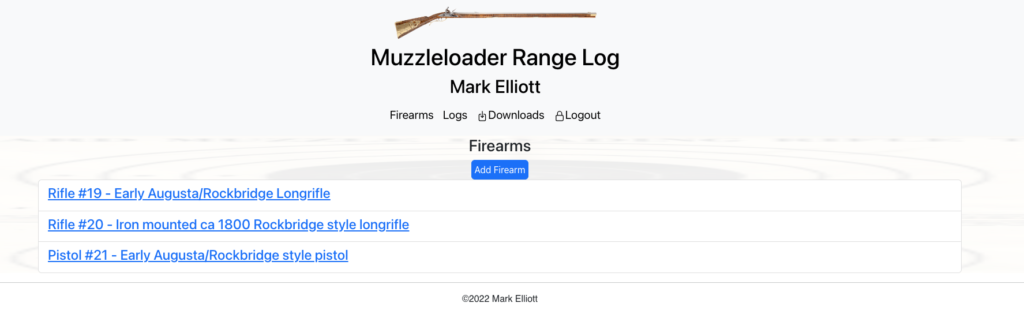
The first thing you need to do is add at least one firearm. You associate a firearm from your Firearms database with each range session defined under Logs. So, click on Firearms to get started. You will be presented with a screen like the one below. Only, initially, you won’t have any firearms in your list. Click the Add Firearm button to remedy that situation.
Populate Firearm Data
You will get a popup window like the one shown below with fields for all the information you can enter about your firearm. The only thing you have to enter for the time being is the name. You can come back and edit this information at any time in the future. If you fill out all the information, The front sight height will be calculated for you. Please note that the touch hole diameter needs to be entered as an integer in thousands of an inch; for example, 62 for 1/16 “. You can enter the caliber as a decimal. This is because the web page language does not allow for leading zeros. Most of the numbers should be entered as integers, but decimals are expected for the barrel diameters, rear sight height, and sight radius. I suggest that a muzzle velocity of 1500 ft/s is a good place to start if you don’t have a better number. By default, all units of measure are English. You can use Metric units by checking the Metric box. You may enter any text you like in the Notes field. Click the Submit button or press the Enter key when you are done entering data.
You can click on any item in the firearms list to view and edit it at any time. This is where you will see the front sight height if you entered all the required information. Please note that if you enter all the information when you add a new firearm, you will need to Click the Submit button again once the front sight height is calculated in order to make sure it is saved to the database. This is only an issue if you plan to download the data to a spreadsheet.
Logs
Next, let’s look at the Logs. Click on Logs to view and add a range session. Once you have some sessions recorded, you will see a list like the follow with the last session displayed first. If this is your first time here, then you won’t have any sessions yet. Click on the Add Session button to add your first one and any subsequent sessions.
Range Sessions
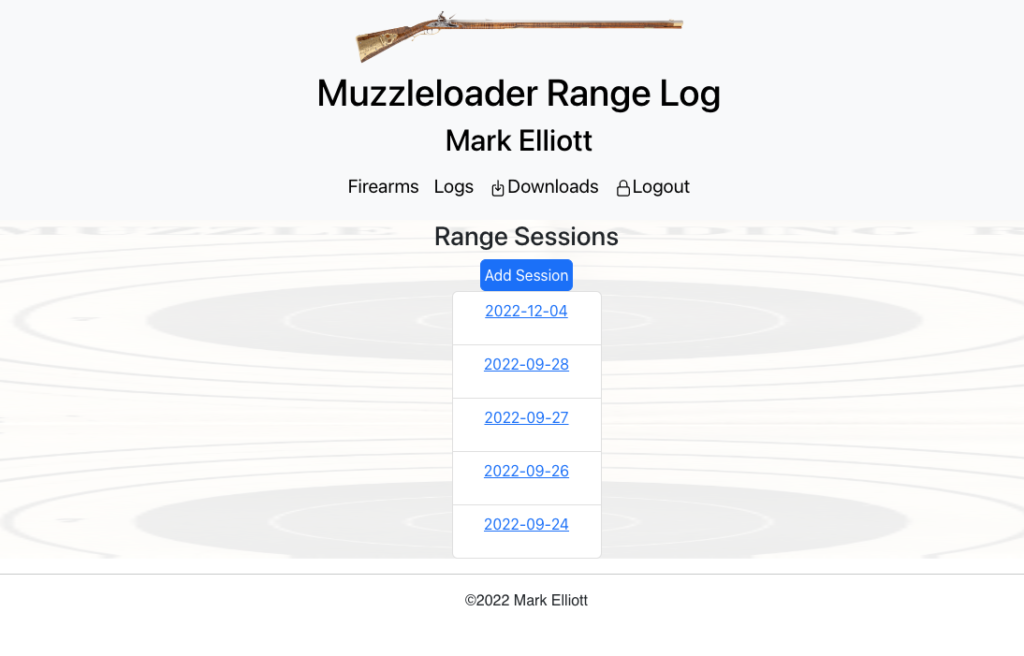
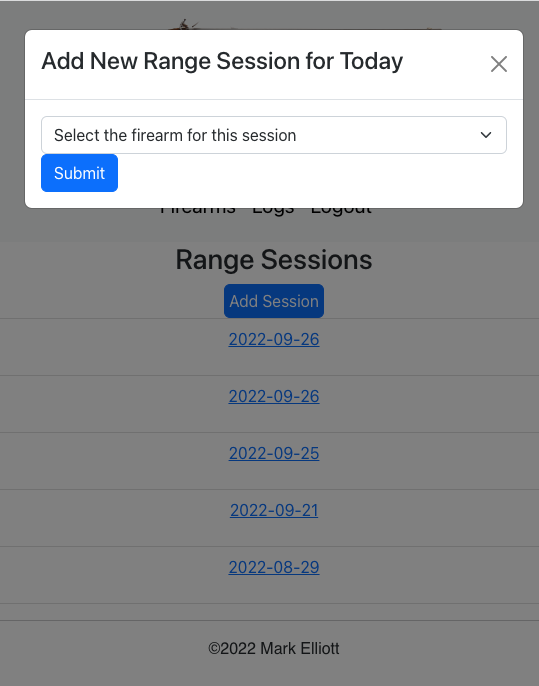
When you click the Add Session button, you will be prompted to select a firearm from your list for that session. A session will be created with that firearm for the current day. You can create multiple sessions in a given day. Select your firearm from the drop-down list and click the Submit button. A new session with today’s date will be added to the top of the session list.
Add a Session
If you then click on that session, you will see that a target has been created, and if you click on the target, you will see that a blank shot has been created ready for you to fill in all the fields.
Add a Target
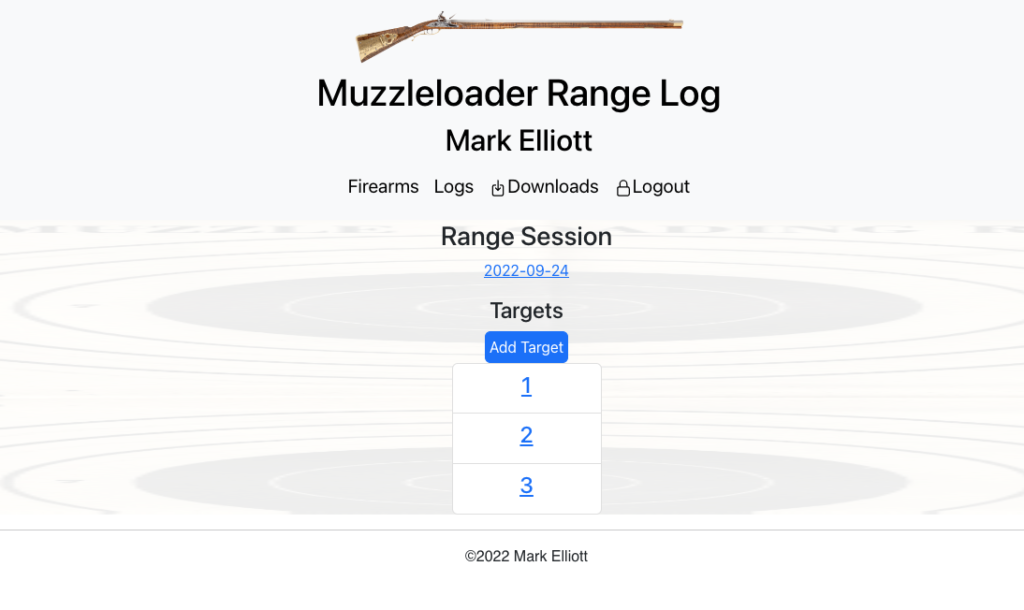
On the screen above you see three targets. The first time you do this, you will see just one. You can return to this target screen anytime by clicking on the session. You can add a new target from this screen by clicking the Add Target button. Each time you click the Add Target button, a new target will be created for the session with one empty shot.
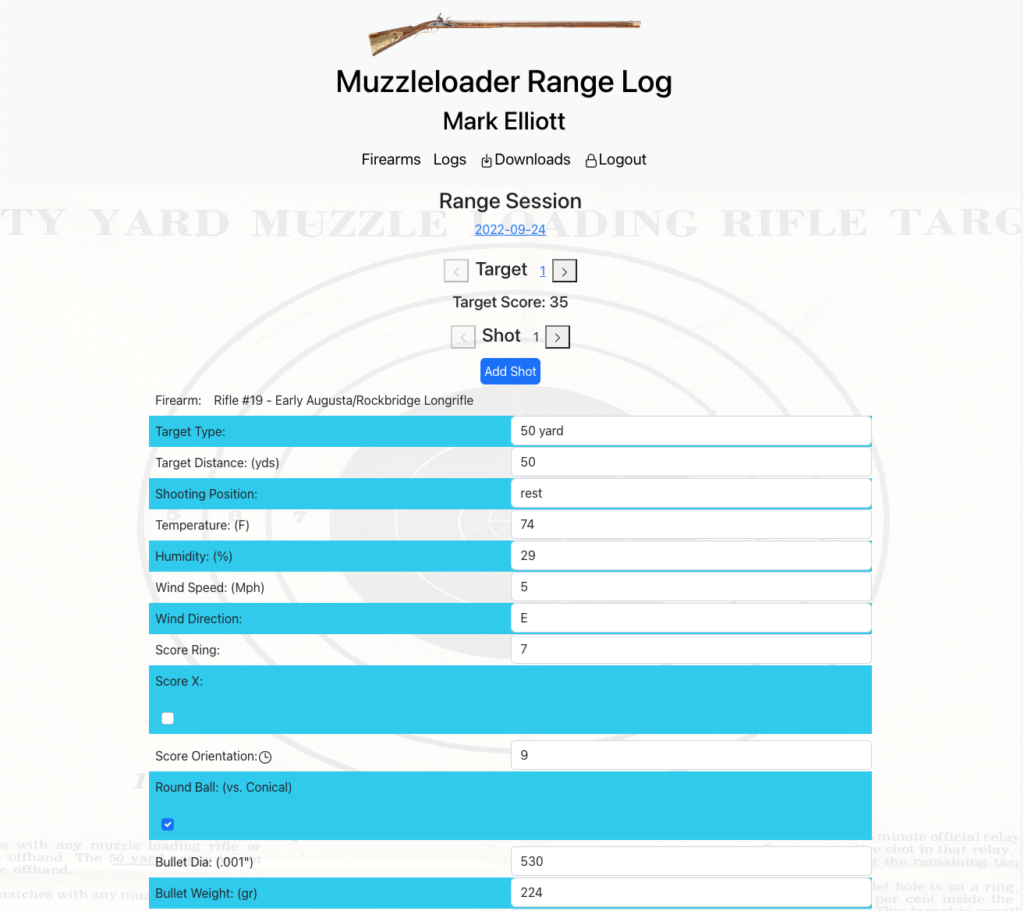
When you click on a target, you get a screen like the one below showing all the shots for that target.
Add a Shot
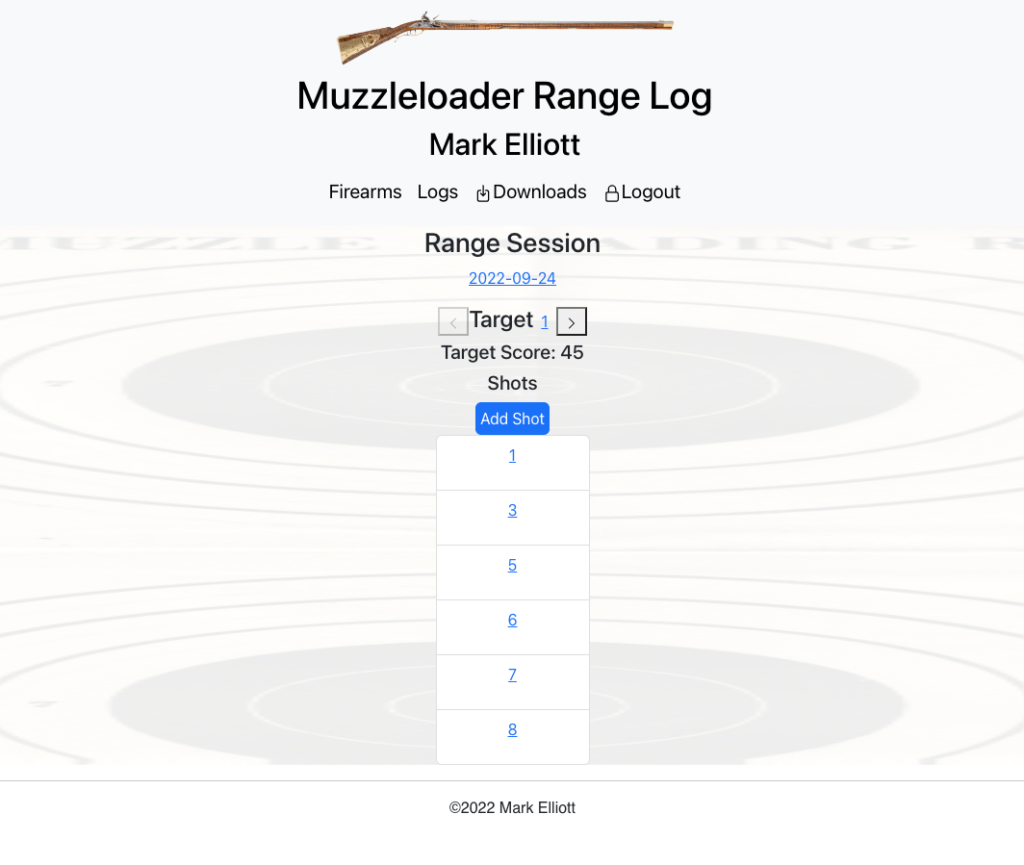
Clicking on a shot will give you a screen like the one below listing all the data for given shot. In the screen capture below, only about half the data is shown. From both this screen and the shots screen above, you can add a new blank shot by clicking on the Add Shot button. You can page through all the shots for the selected target by click on the arrow buttons to either side of the Shot indicator. If you have multiple targets, you can page through those by clicking the arrow buttons on either side of the Target indicator.
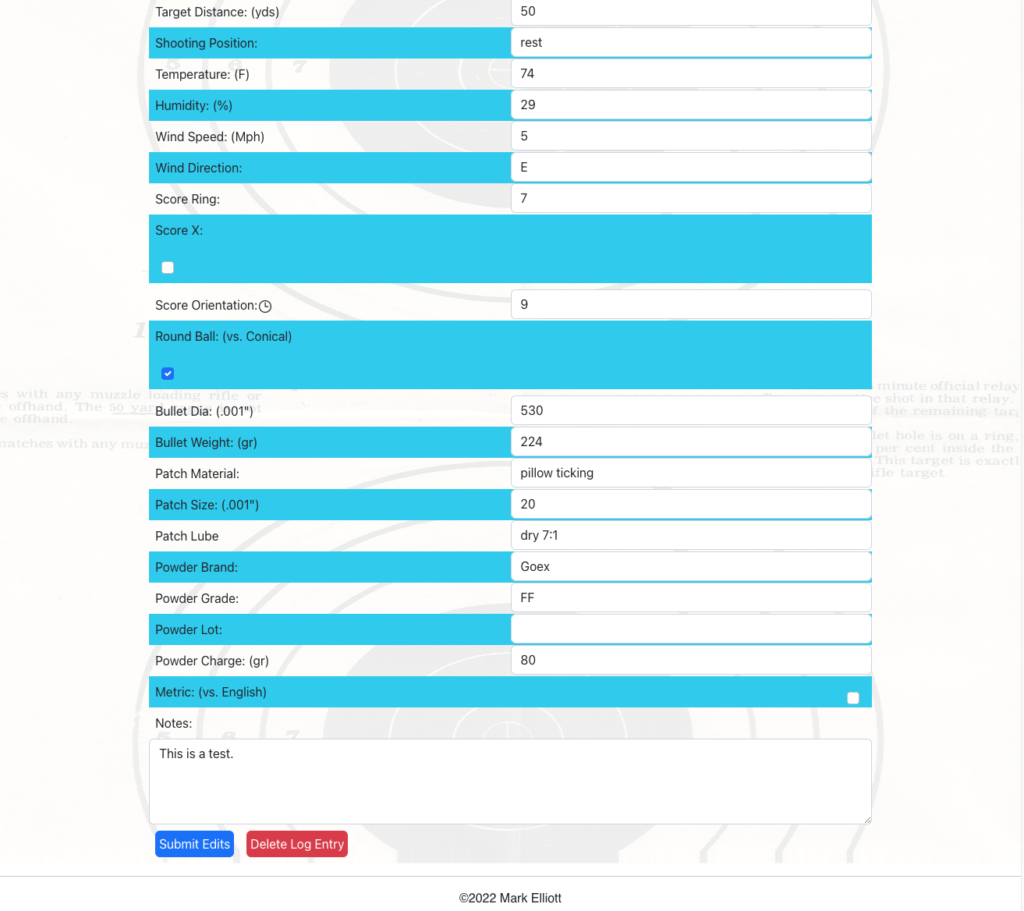
EDIT A SHOT
The remainder of the shot data is shown below. Once you have filled in all the data you want, save it by clicking the Submit button or pressing the Enter key. You can revisit this screen anytime you want by clicking of the shot from the shots screen and edit anything on it. You just can’t delete anything. I had initially provided that ability to delete shots and firearms but thought better of it and removed that option. I can easily add that option back if there is enough demand for it, but I really couldn’t think of a good reason for deleting data. The purpose of a log is to record everything for future use. We want more data, not less. That said, if you can think of more data that needs to be collected, I can relatively easily add new fields.
Downloads
While your data is safe and secure in the cloud, I realize it brings a level of comfort to have an offline copy. Consequently, I have provided a facility to download the firearms list and the logs into CSV files that can be displayed by any spreadsheet program such as Microsoft Excel or Google Sheets.
Download Data
To download your firearms or logs data, click on the Downloads link on the navigation bar. The following screen will be displayed.
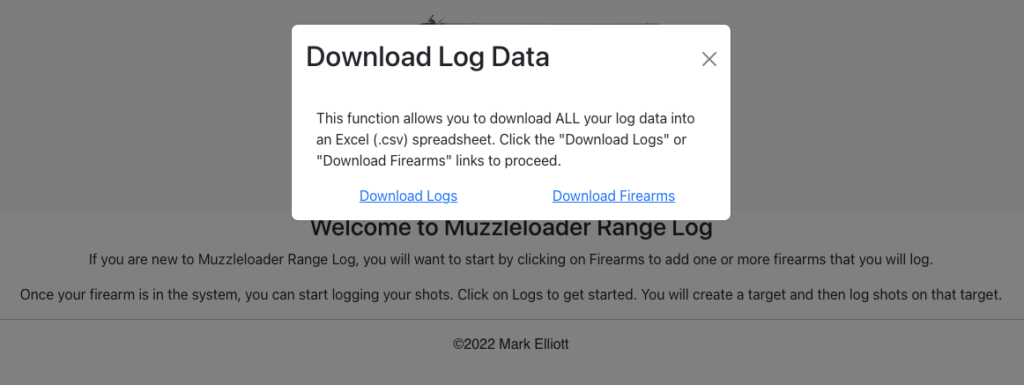
From this point, just click on either of the Download Logs or Download Firearms links. A CSV file with a randomly generated file name will automatically be downloaded to your local system. For most users, this will go in the Downloads folder. From this point, you can open the file do with it as you wish.
Well, those are all the instructions for now. Let me know if you have any questions or suggestions by leaving a comment or using the Contact page.