Handmade Tumbler Trouble
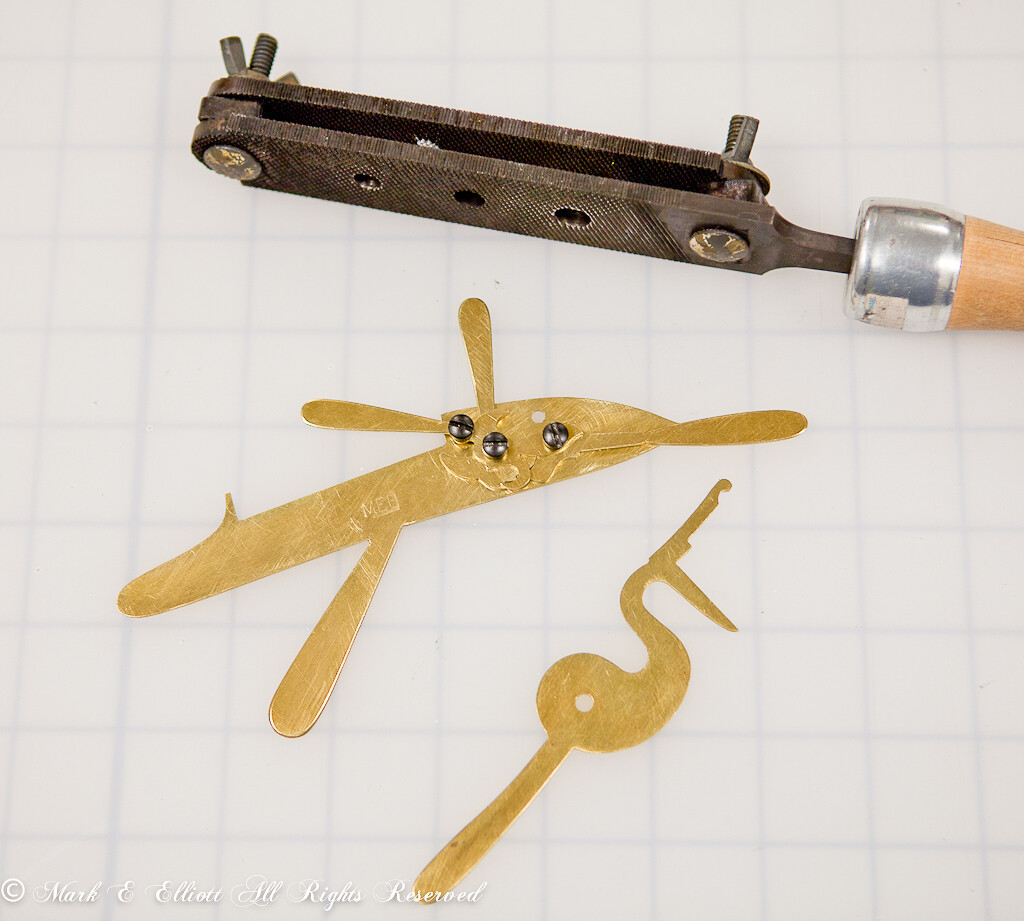 In conjunction with some recent repair/restoration work, I have started working on an all handmade flintlock. That means one made of wrought iron in the same manner as an 18th century Virginia gun shop including making all the screws. I have completed a set of templates for the lock and have forged a blank for the tumbler. I have also made a tumbler mill from a large file that is used to mill the parallel sides on the tumbler. I will probably do the plate next.
I had to use my last tumbler blank for another project, so I will have to make another for myself; most likely with a newly made die. It is probably instructive to explain why I had to use the wrought iron blank on another project. I had been trying to make a replacement tumbler for a contemporary flintlock pistol using O-1 tool steel. I was forging a blank just like with wrought iron which involves hammering out what looks like a large lopsided nail. Then I was machining the blank on a lathe and filing the profile and notches. The problem was that I had been running into forging cracks in these tumblers, and you don’t find them until you have machined each surface. I lost count of how many blanks I made. I almost finished two, only to self inflict some other injury at the end. That was two out of six or seven blanks that were free of forging cracks.
The problem was that the tool steel was being quenched by the colder anvil and hardened in spots. So, if you are working below the re-crystalization temperature, about 1500F (cherry red), you run the risk of cracking the tumbler on the side against the anvil. The more the blank was worked, the more likely to produce cracks. The two blanks that were free of forging cracks(or at least as far as I could tell) were ones that I worked the least. My blows just happened to be more efficient on those. I decided that it is just too much trouble to try to forge tumblers from tool steel.
Fortunately, I have plenty of third run 1.25″ round wrought iron bar that is just fine for lock parts. There are a few small inclusions, but not many. So, from now on, I will make all my lock parts and many tools, except the springs, from wrought iron or mild steel and case harden them. That is period correct anyway.
Tools for Creating a Handmade Flintlock
 Work is underway on the dies to forge all the lock parts as finished as possible. The effort to make the dies has two purposes; to explore period lock production and more efficiently produce multiple locks. My intention is to make at lease two handmade flintlocks; one for a handmade flintlock rifle and one for a handmade flintlock pistol.
The documentation for the dies I intend to reproduce, come from two sources; articles in JHAT Vol I & Vol V written by Gary Brumfield, and subsequent research done by George Suiter. Gary was the second master of the gun shop in Colonial Williamsburg, and George is the current master. George has added dies and jigs to the lock production in the CW Gunshop since the JHAT articles were written.
 Of particular interest is that the gun shop in Colonial Williamsburg has not been forge welding pans onto lock plates for some time. They are using a modified lock plate die and a fairly complex die to form the pan, pan bridle, and fence. They actually have dies for most of their parts as well as a drilling jig for the plate. The dies and jigs are based on documented tools and processes used by the lock makers of Birmingham, England.
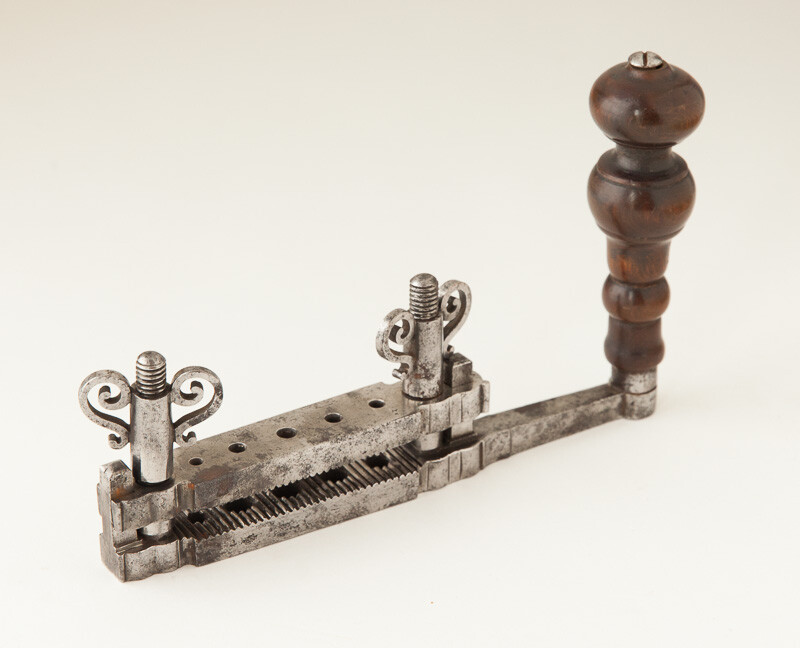 A photo a the beginning of this article shows a tumbler mill copied from the JHAT I article and made from a 12″ bastard file. This design never worked very well for me or the CW Gunshop (according to Gary Brumfield); and come to find out, the actual 18th C tumbler mills were not made exactly like a file. The photo to the right shows an fancy 18th Century tumbler mill of, supposedly, the same design; a design documented in Diderot and some period German publications. I plan to make a mill based on the tool in the photo. It is really hard to see from the attached photo; but the “teeth” in the actual mills were perpendicular to the long axis of the mill, cut with a triangular file, and flat on top. That is why they worked better that our uninformed attempts to recreate them with a file. The CW Gunshop currently uses a copy of what is probably more of a 19th century English tumbler mill with rotary cutters. This is a more effective design that the tumbler mill shown.
Handmade Lock Project Progress
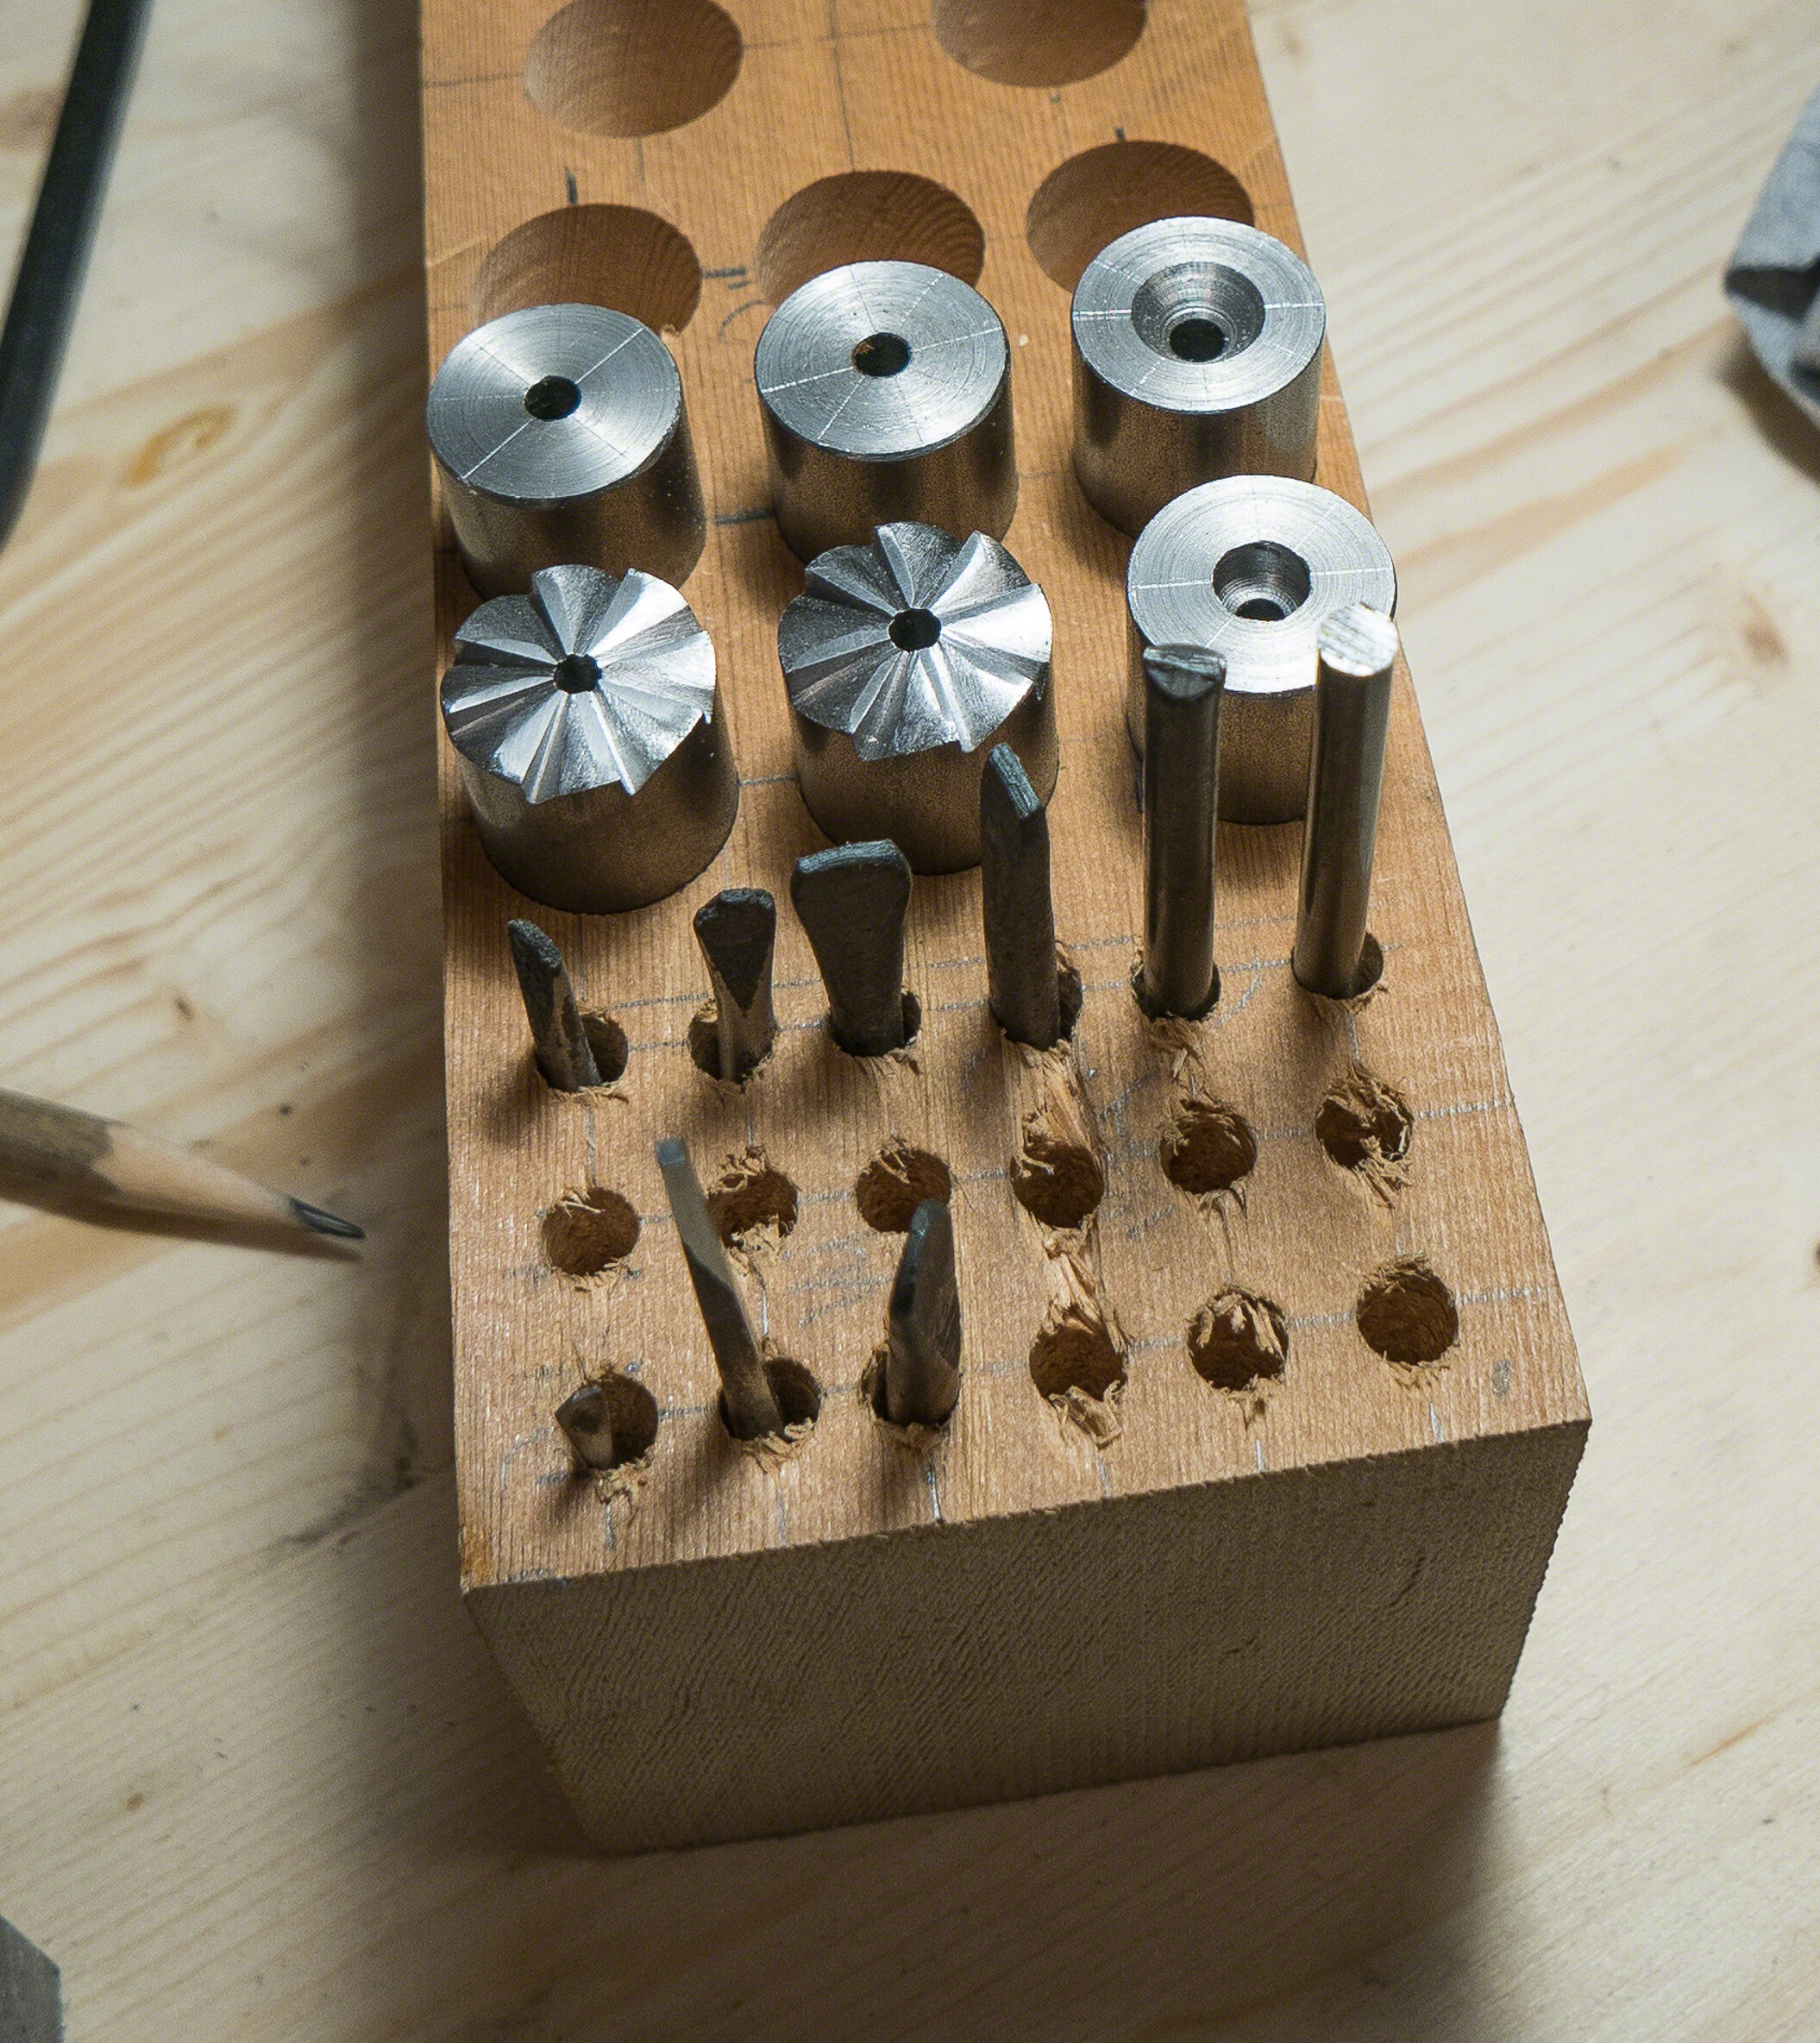
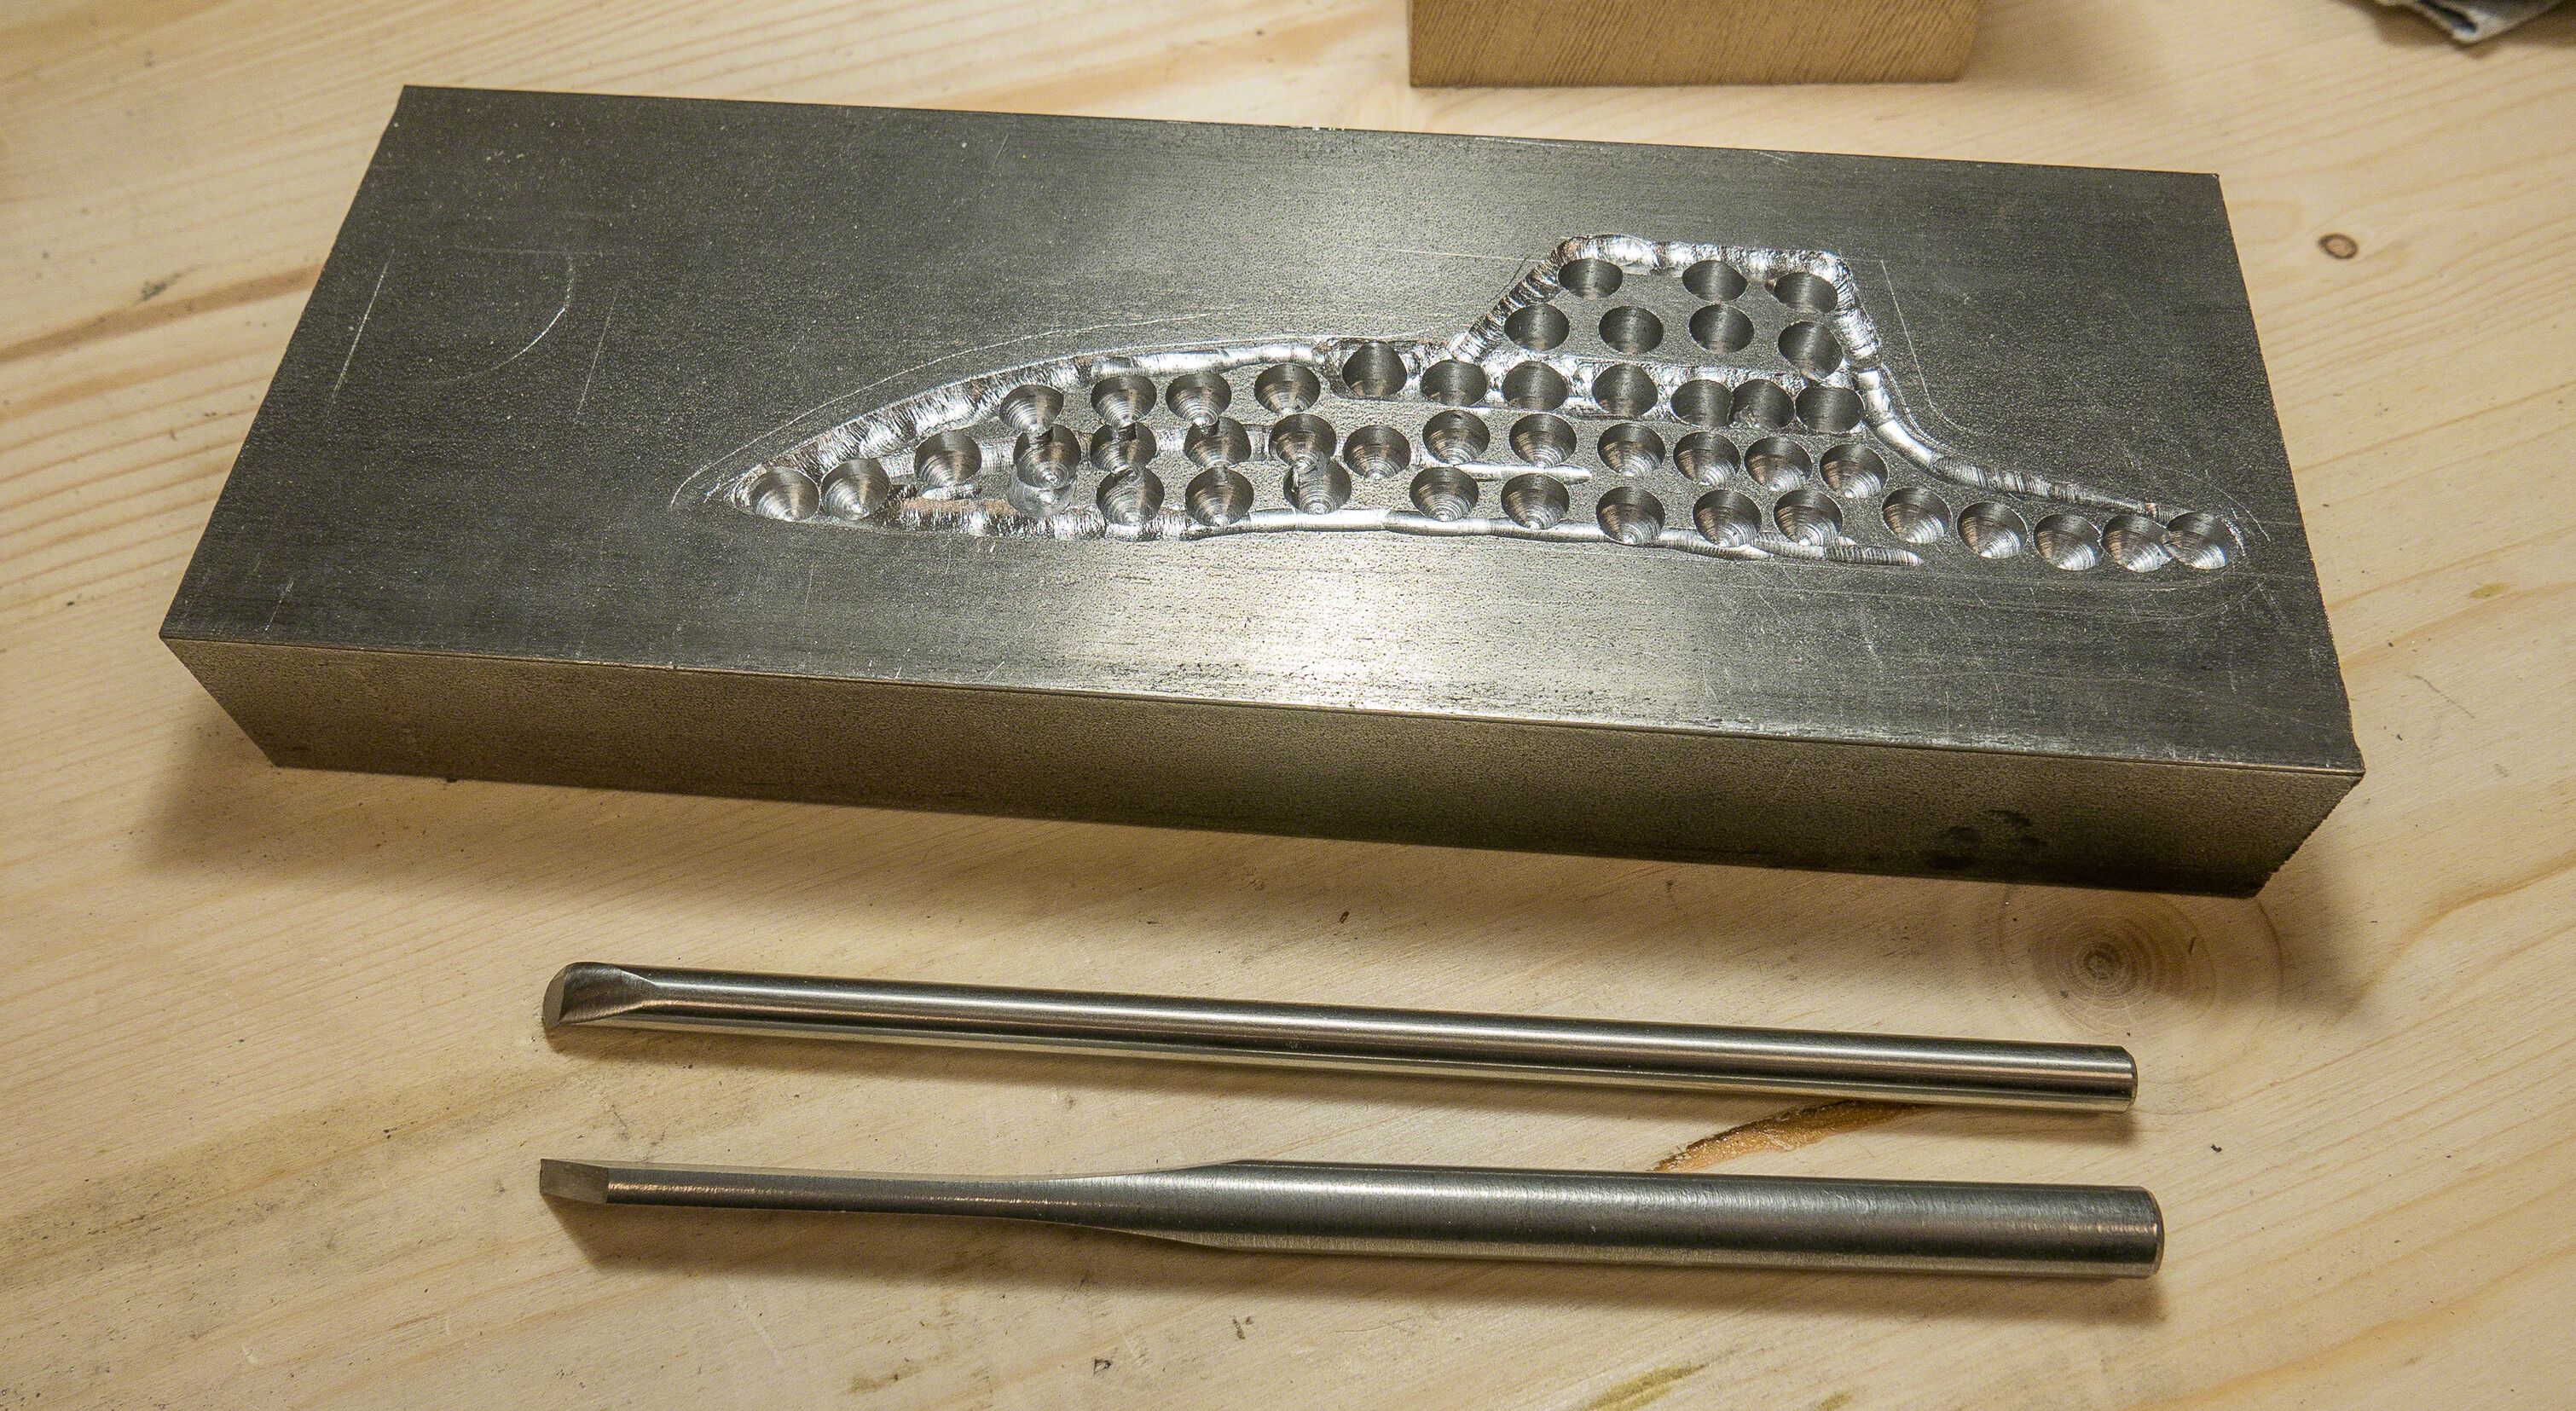 Steel has been purchased for all the lock dies, screw mills, and tumbler mill. The pieces have been cut to shape and are ready for the dies to be cut and the hardie posts to be welded. The chisels have been made are are being used to cut the dies. I have also made the drill bit, reamer, tap, and screw mills for the internal lock screws.
 I should note that while I intend to make the flintlock using period tools and techniques, I don’t intend to make the tools entirely same way. As these tools were usually purchased by the gunsmith from England, I feel perfectly justified in making them however I like. That includes using a belt sander instead of an old stone grinding wheel, a drill press, and a metal lathe, if necessary. I will point out that they did have water powered grinding wheels, drill presses and metal lathes in the English shops. As I have no other alternatives, I will still use the forge, files, and chisels in the old way.
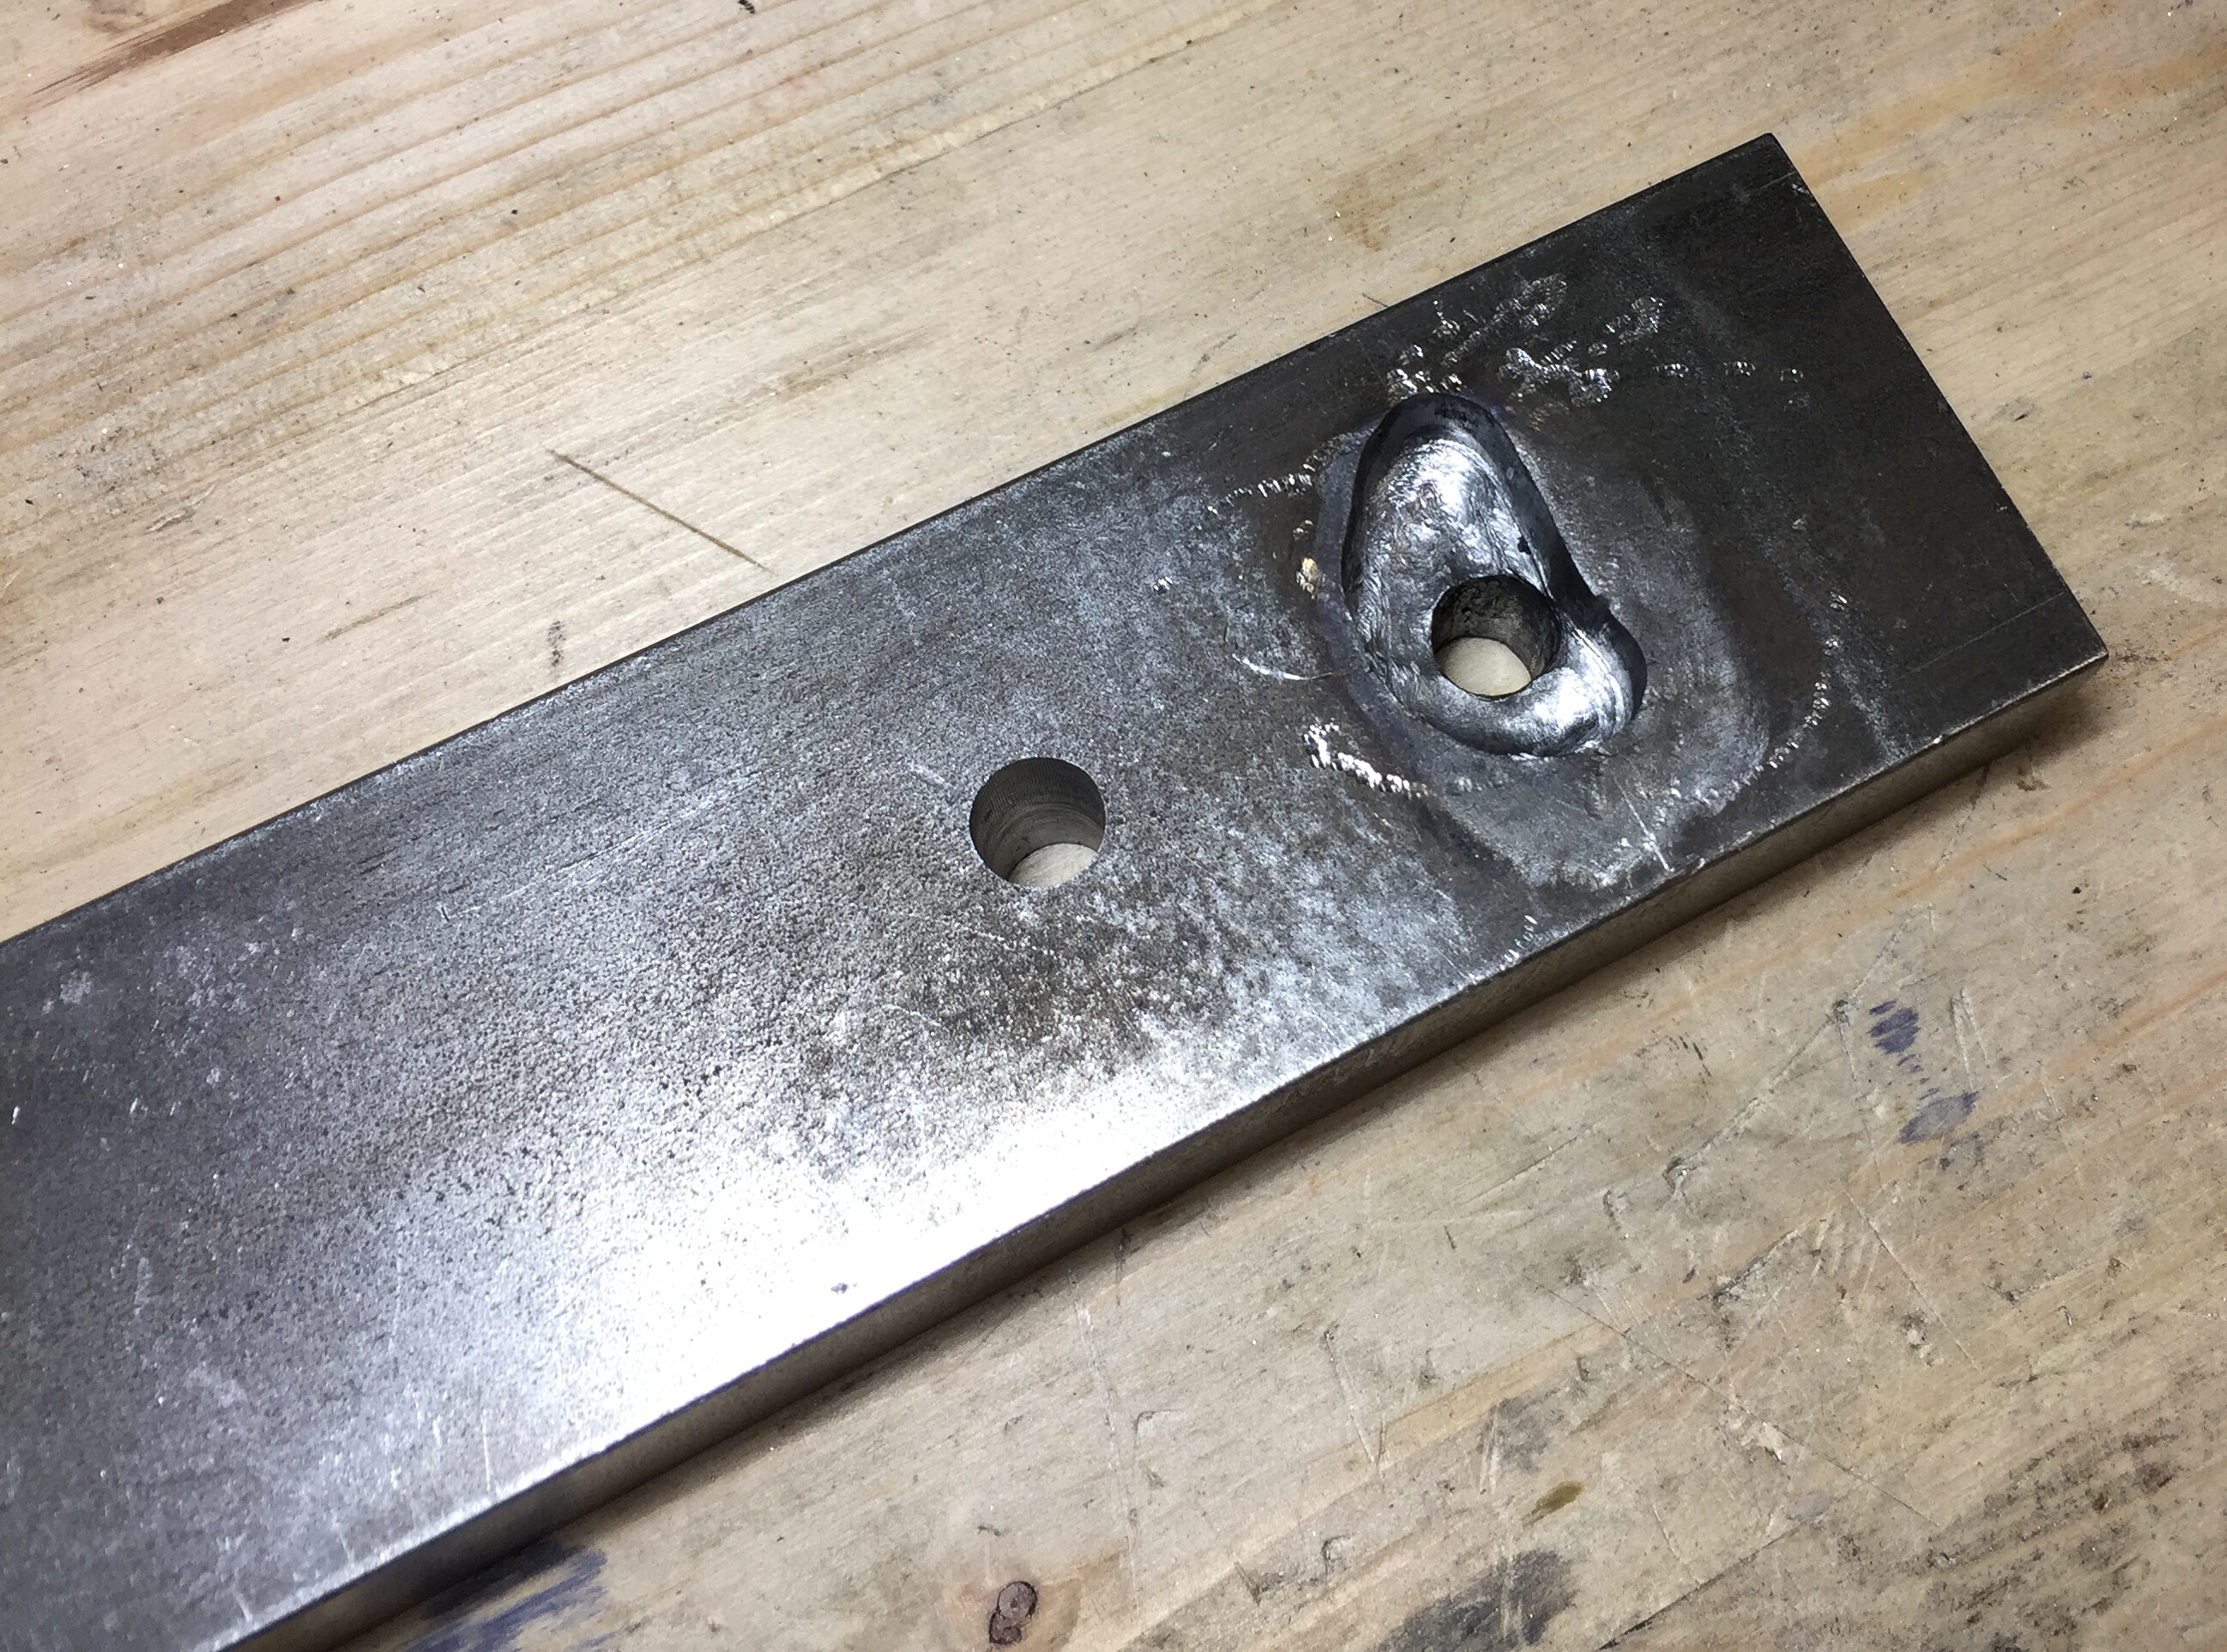
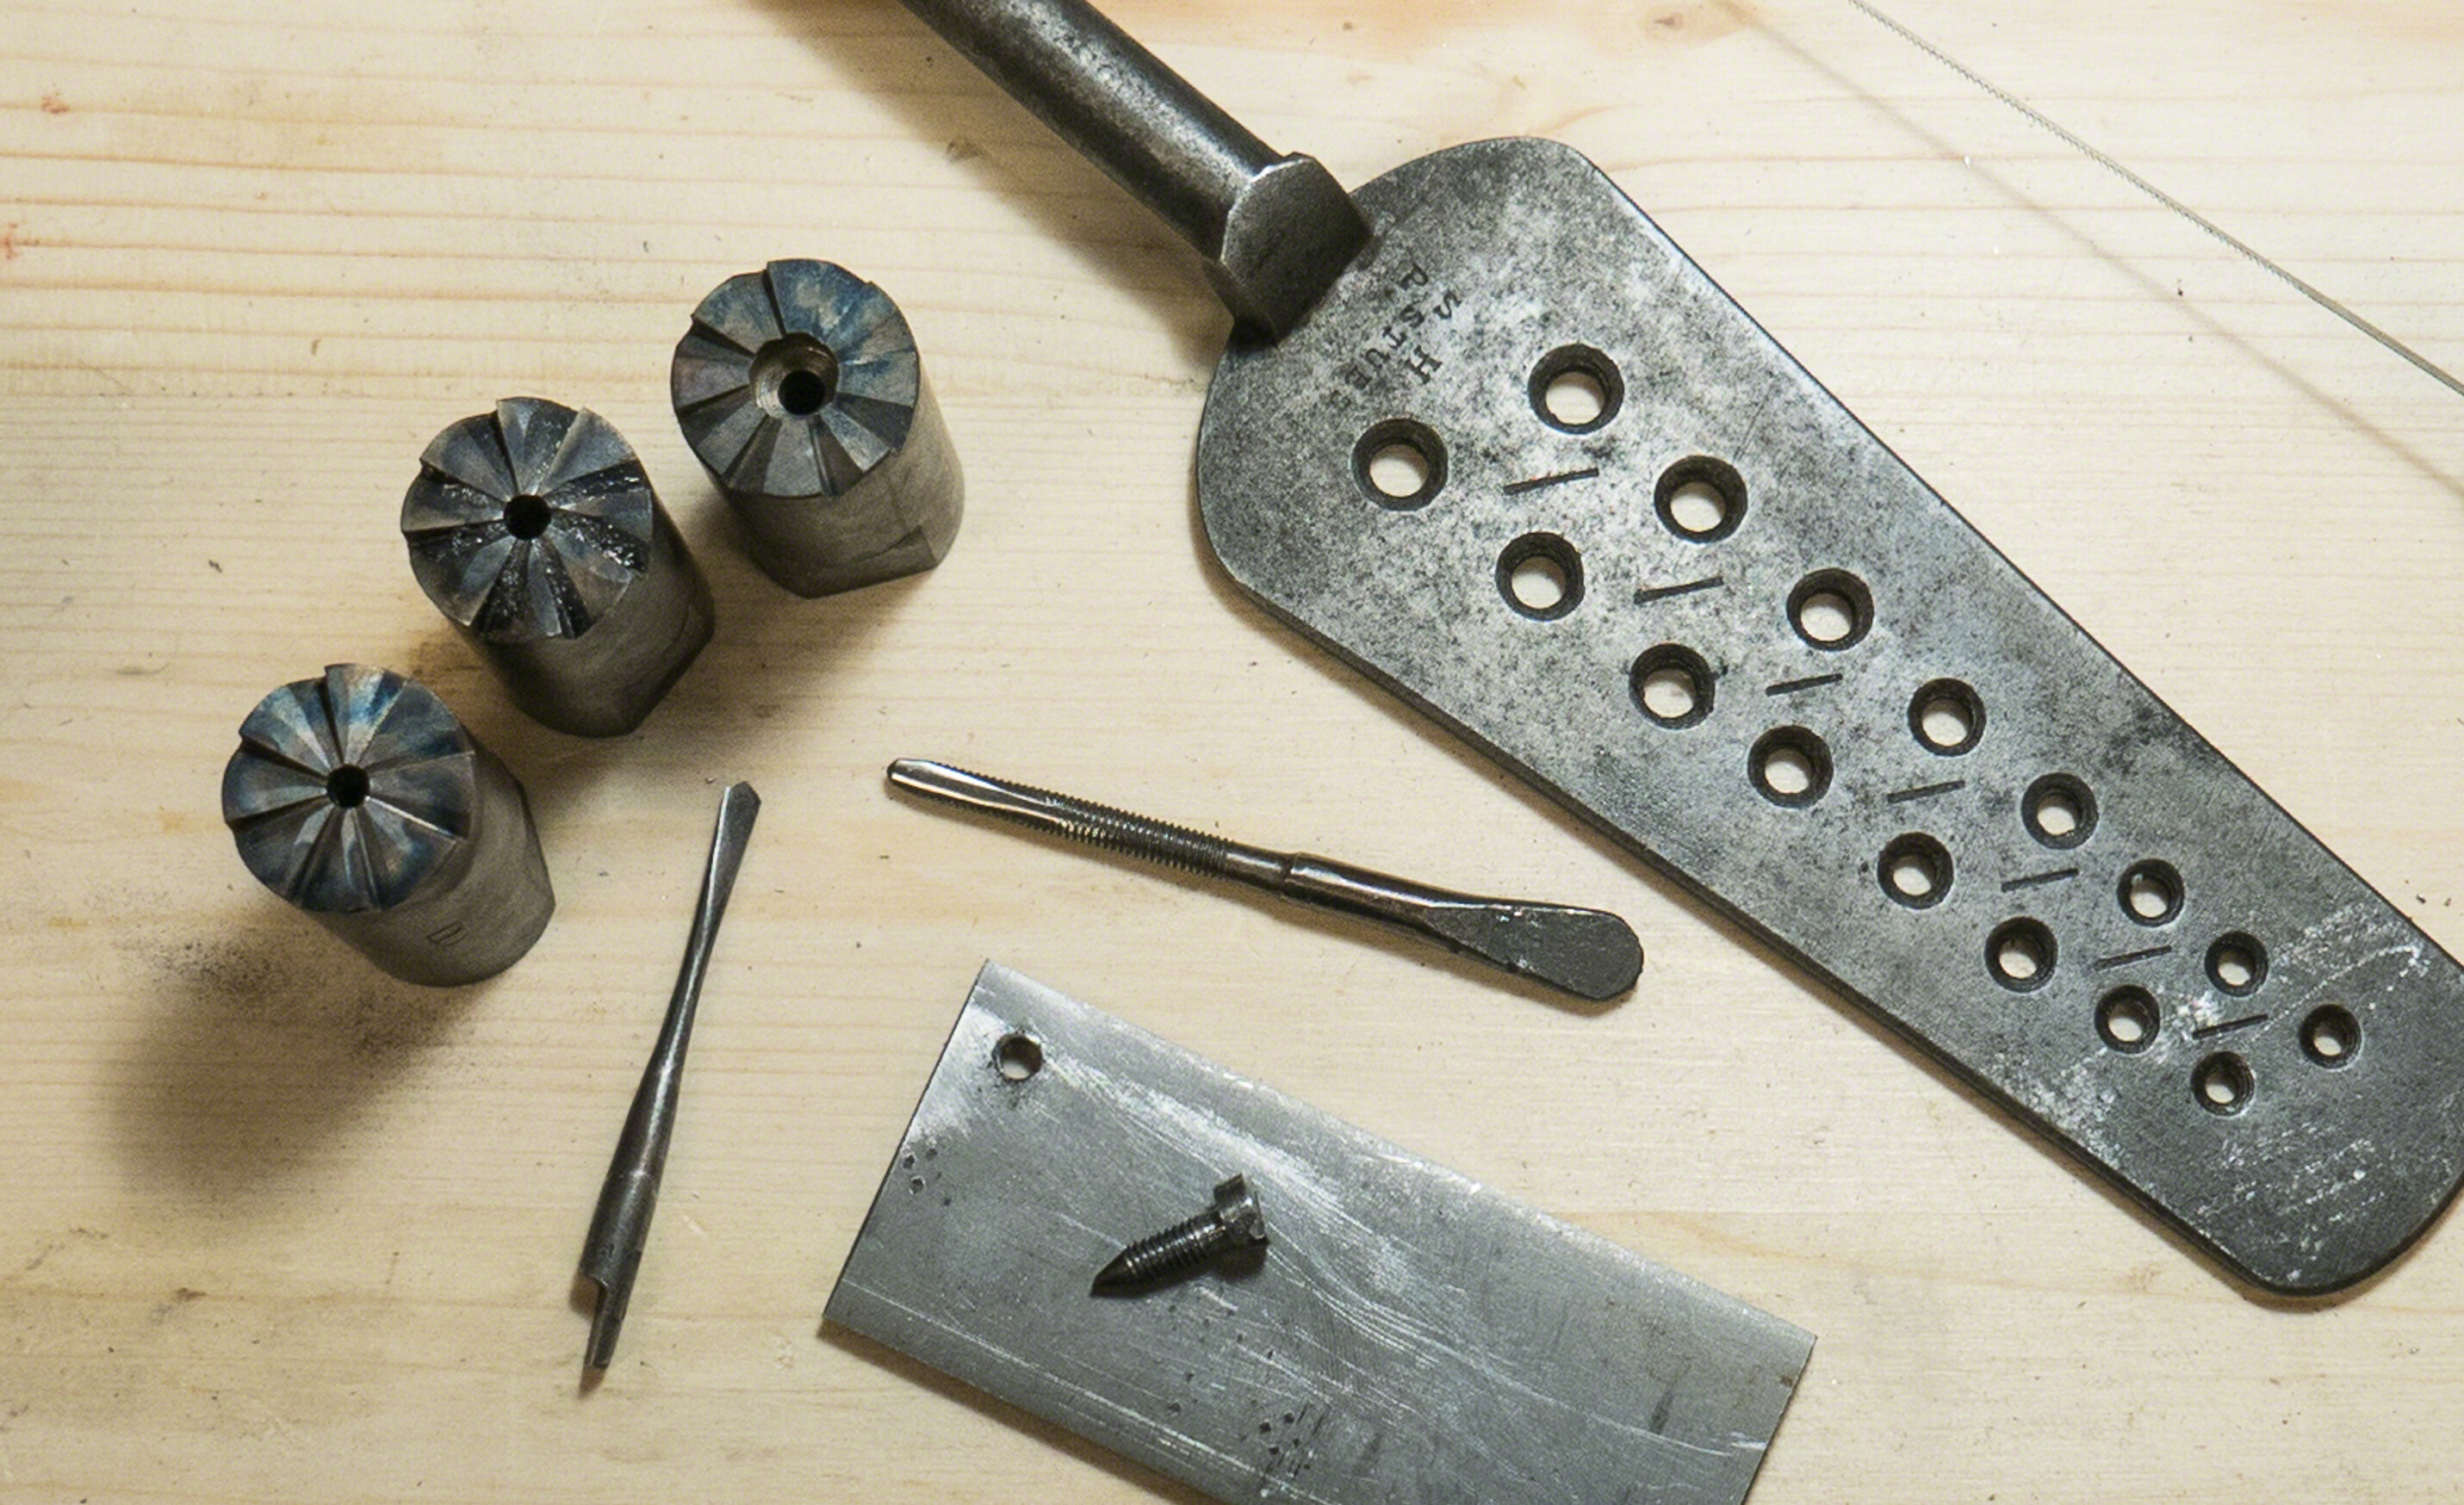 Here is a photo of the first handmade lock screw I made. I used the screw mills shown just after case hardening them. Also shown is the tap drill and tap that I made as well as a plate with a hole that I drilled and tapped with those tools. It took less than an hour to make the screw using a rod of 12L14 steel (the usual screw making stock and very similar in softness to wrought iron) that had been previously squared for the brace on one end and pointed on the other. I could have done a better job with the screw by pointing the rod with more care to make sure it was centered.
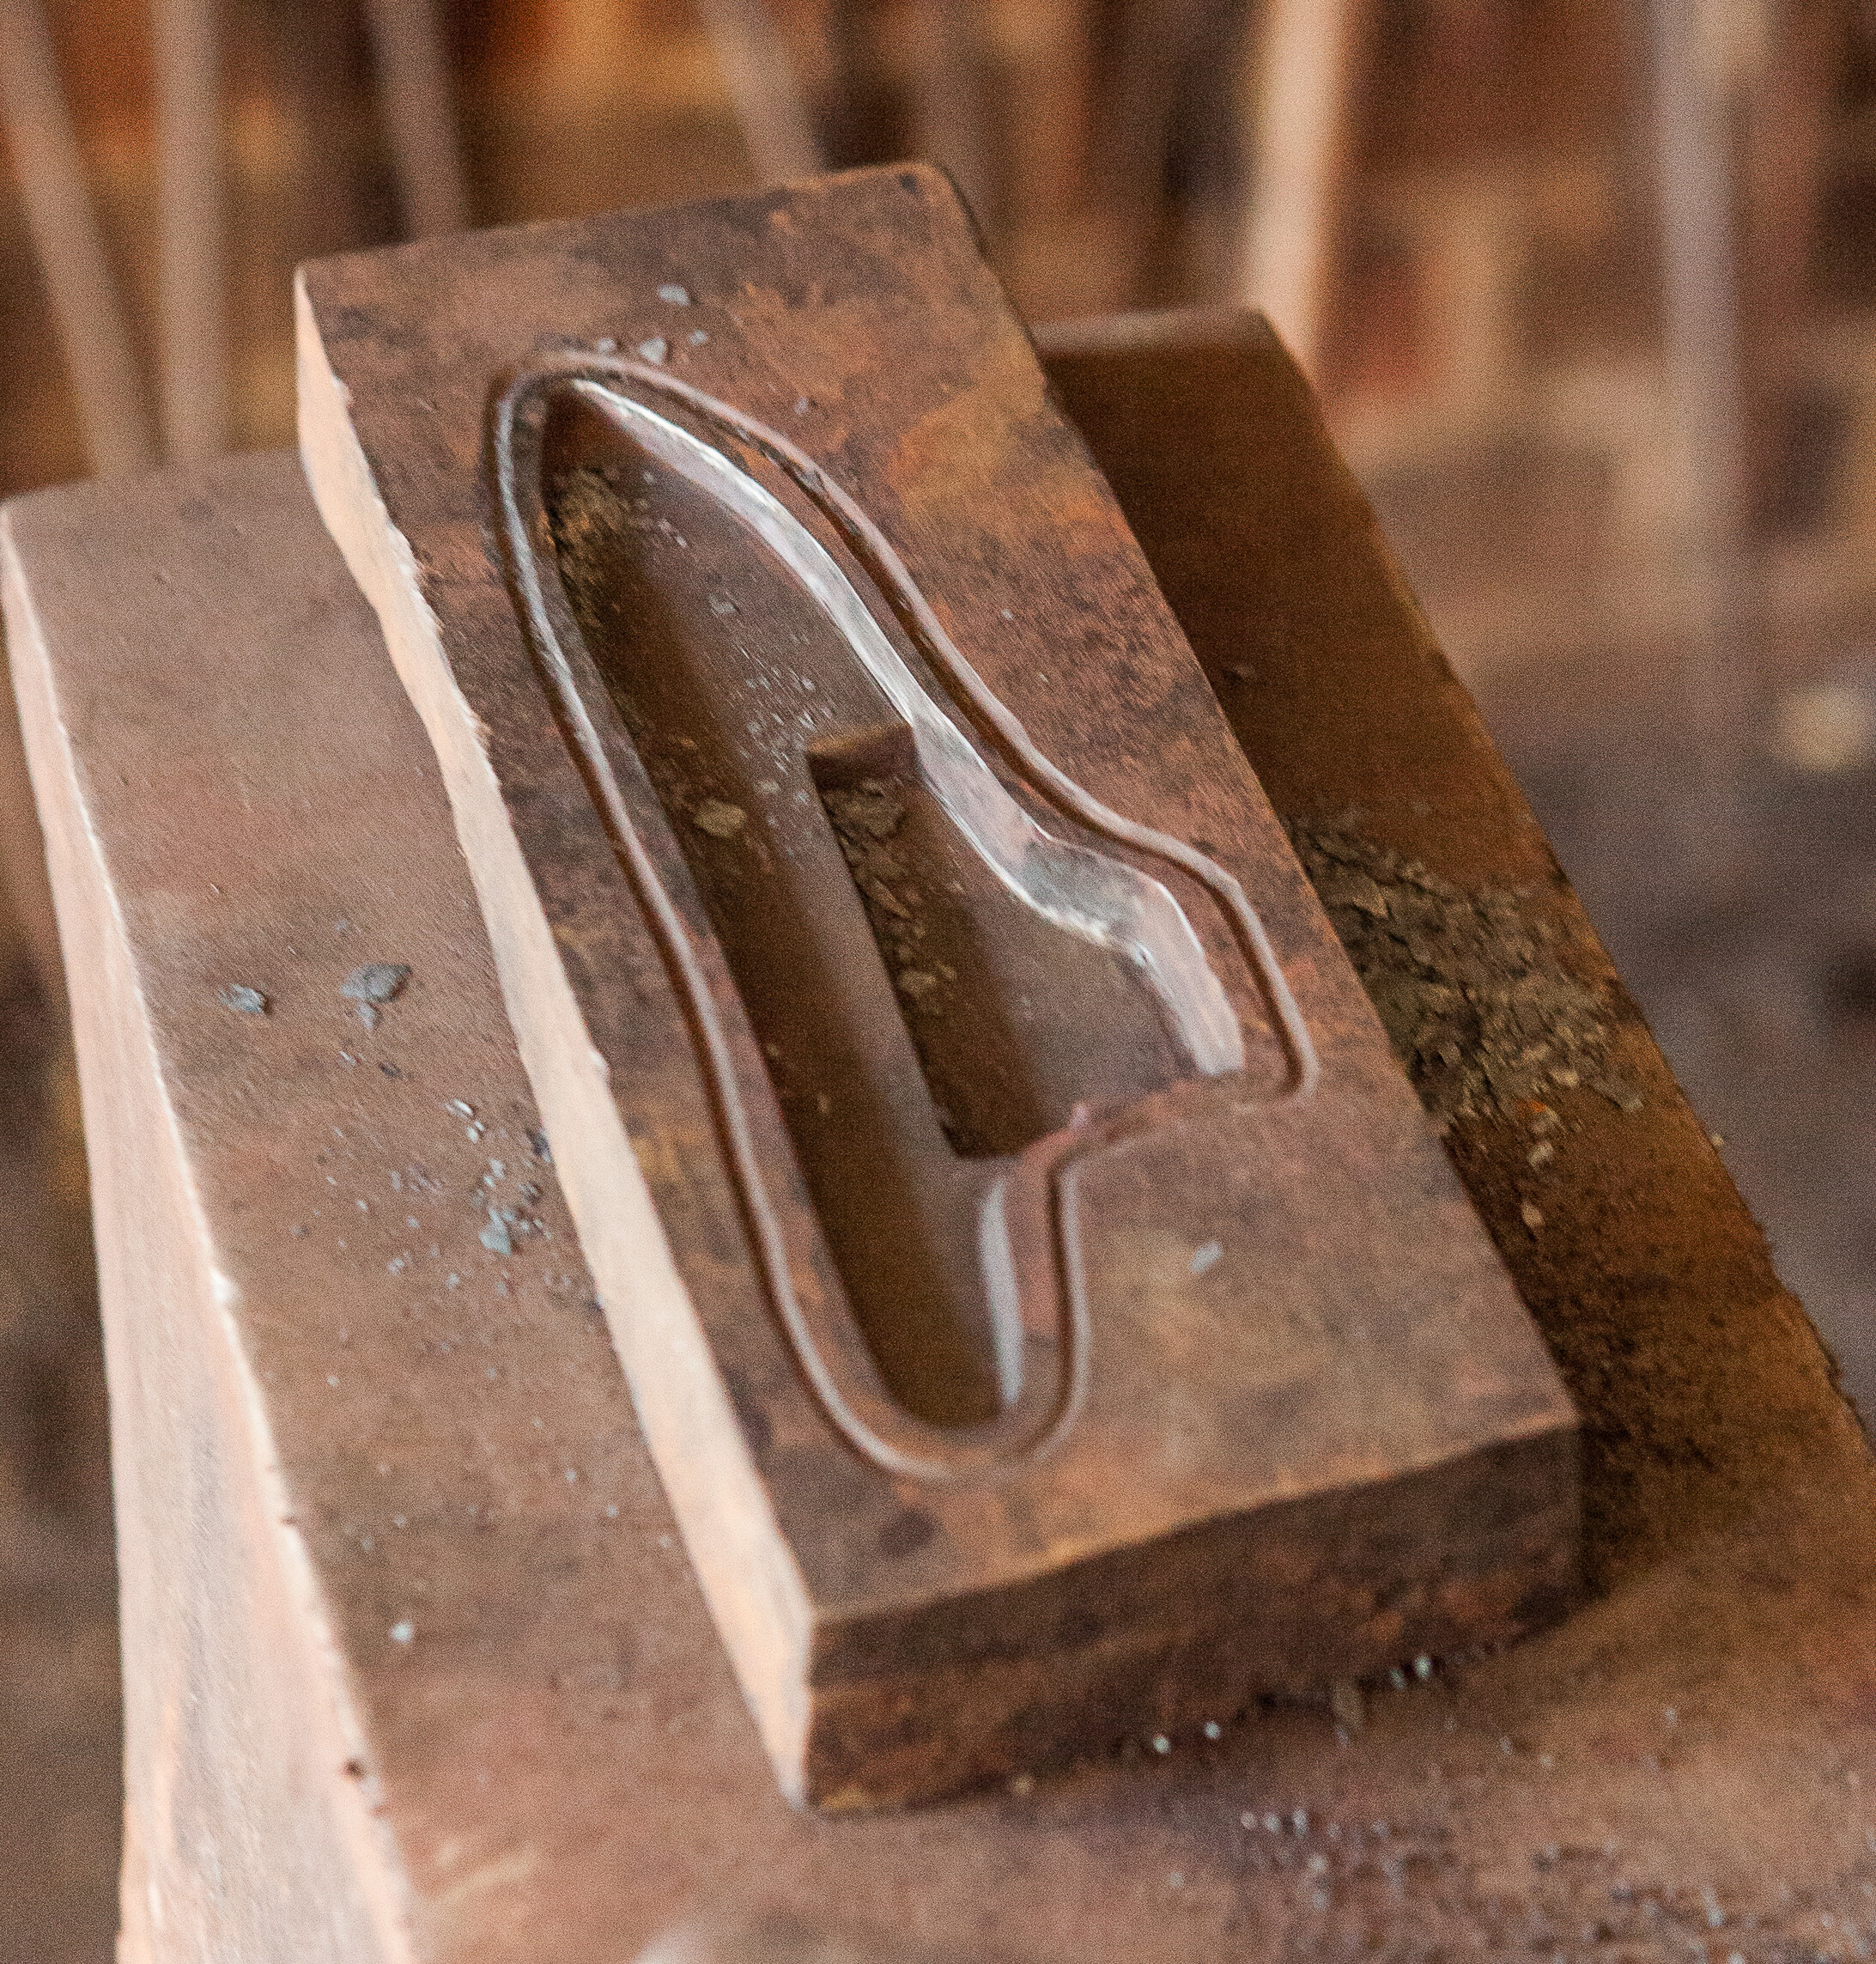
 I had a job come up repairing an antique lock that allowed me the opportunity to make a couple more lock making tools on my list. I had to replace a cracked tumbler, so the time was right to make a tumbler die for forging a wrought iron tumbler blank. I made the die so that I ended up with a blank large enough to machine a tumbler for most any rifle size lock.
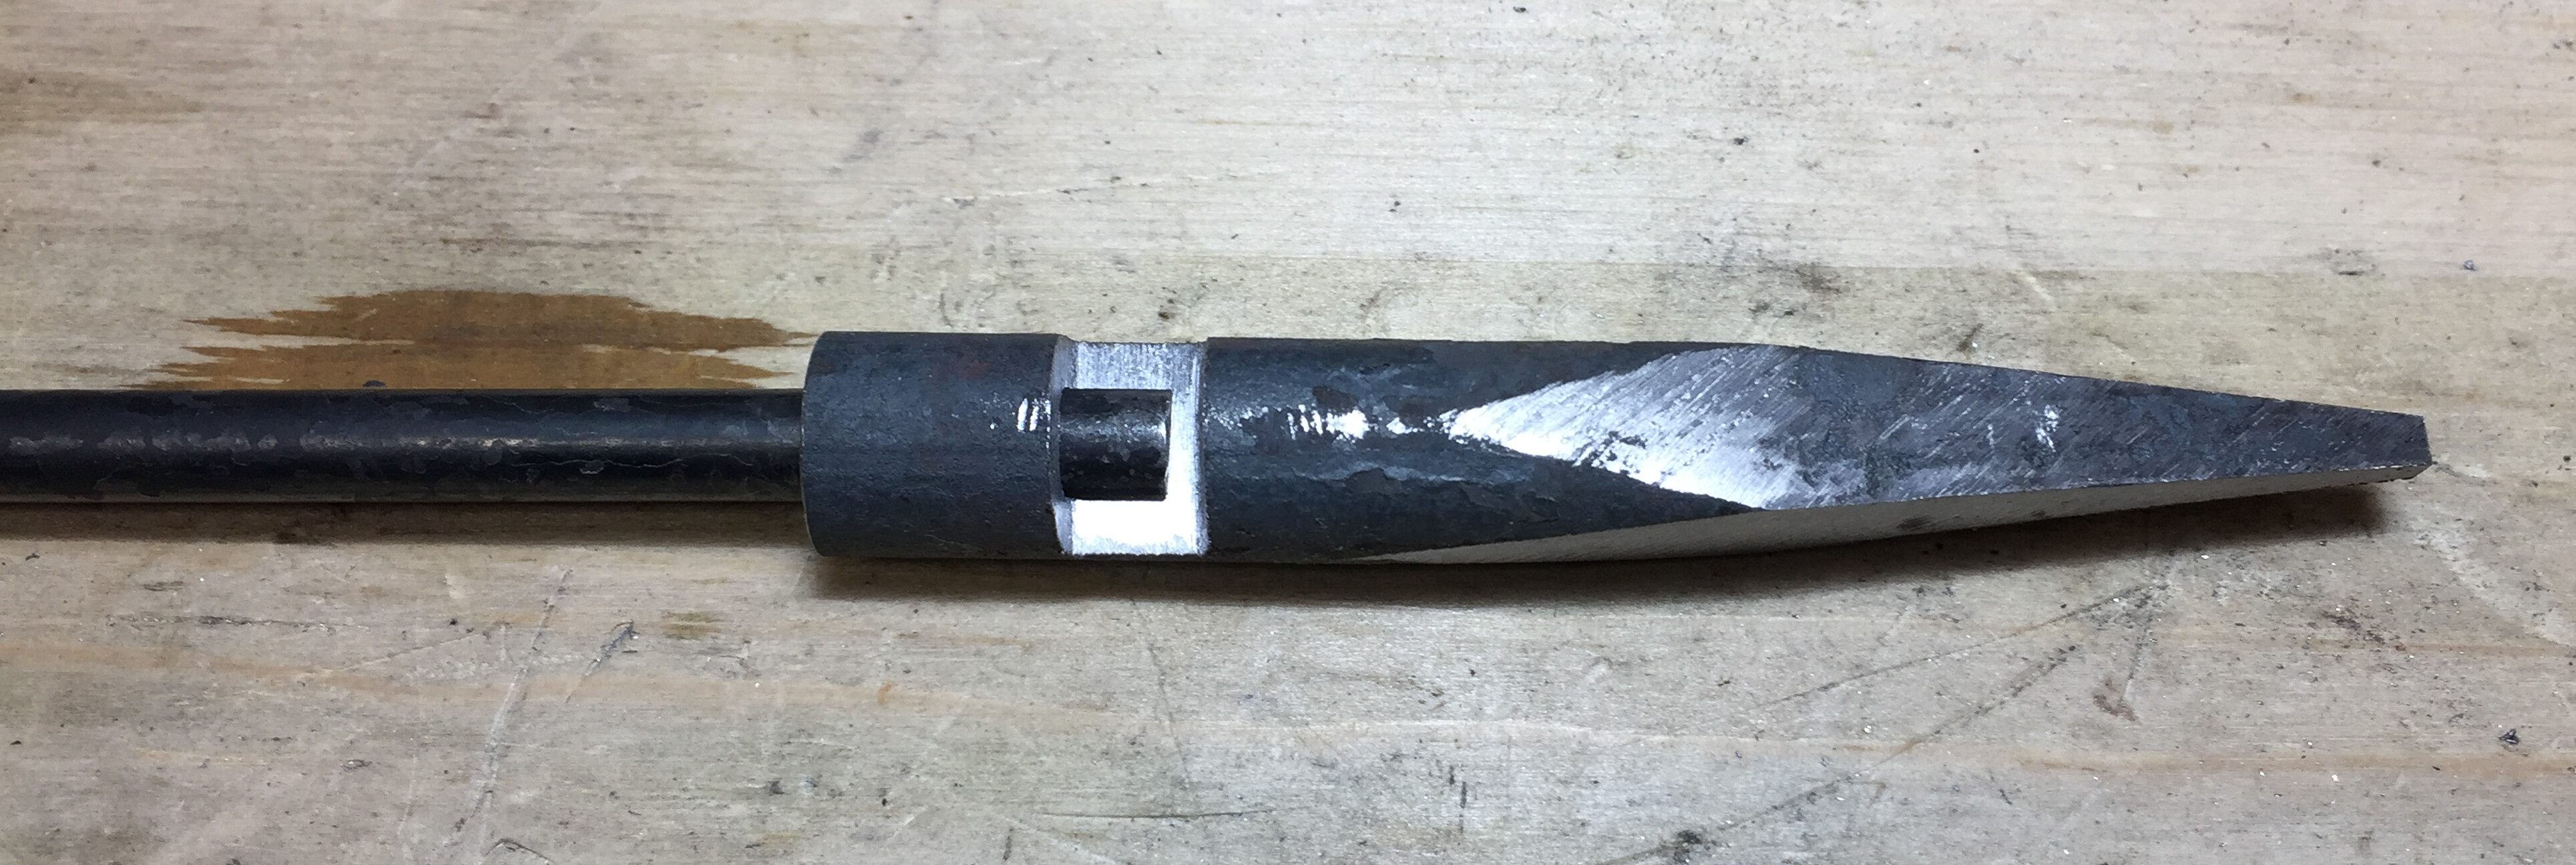 Since I had a couple hours at the forge to make the tumbler blank, I slipped in another little forging project; making a lantern stock chuck for screw stock. In the past, I hammered a square end directly on the screw stock, but that wobbled too much in the brace. I felt that a lantern stock chuck would be more stable, and it is.
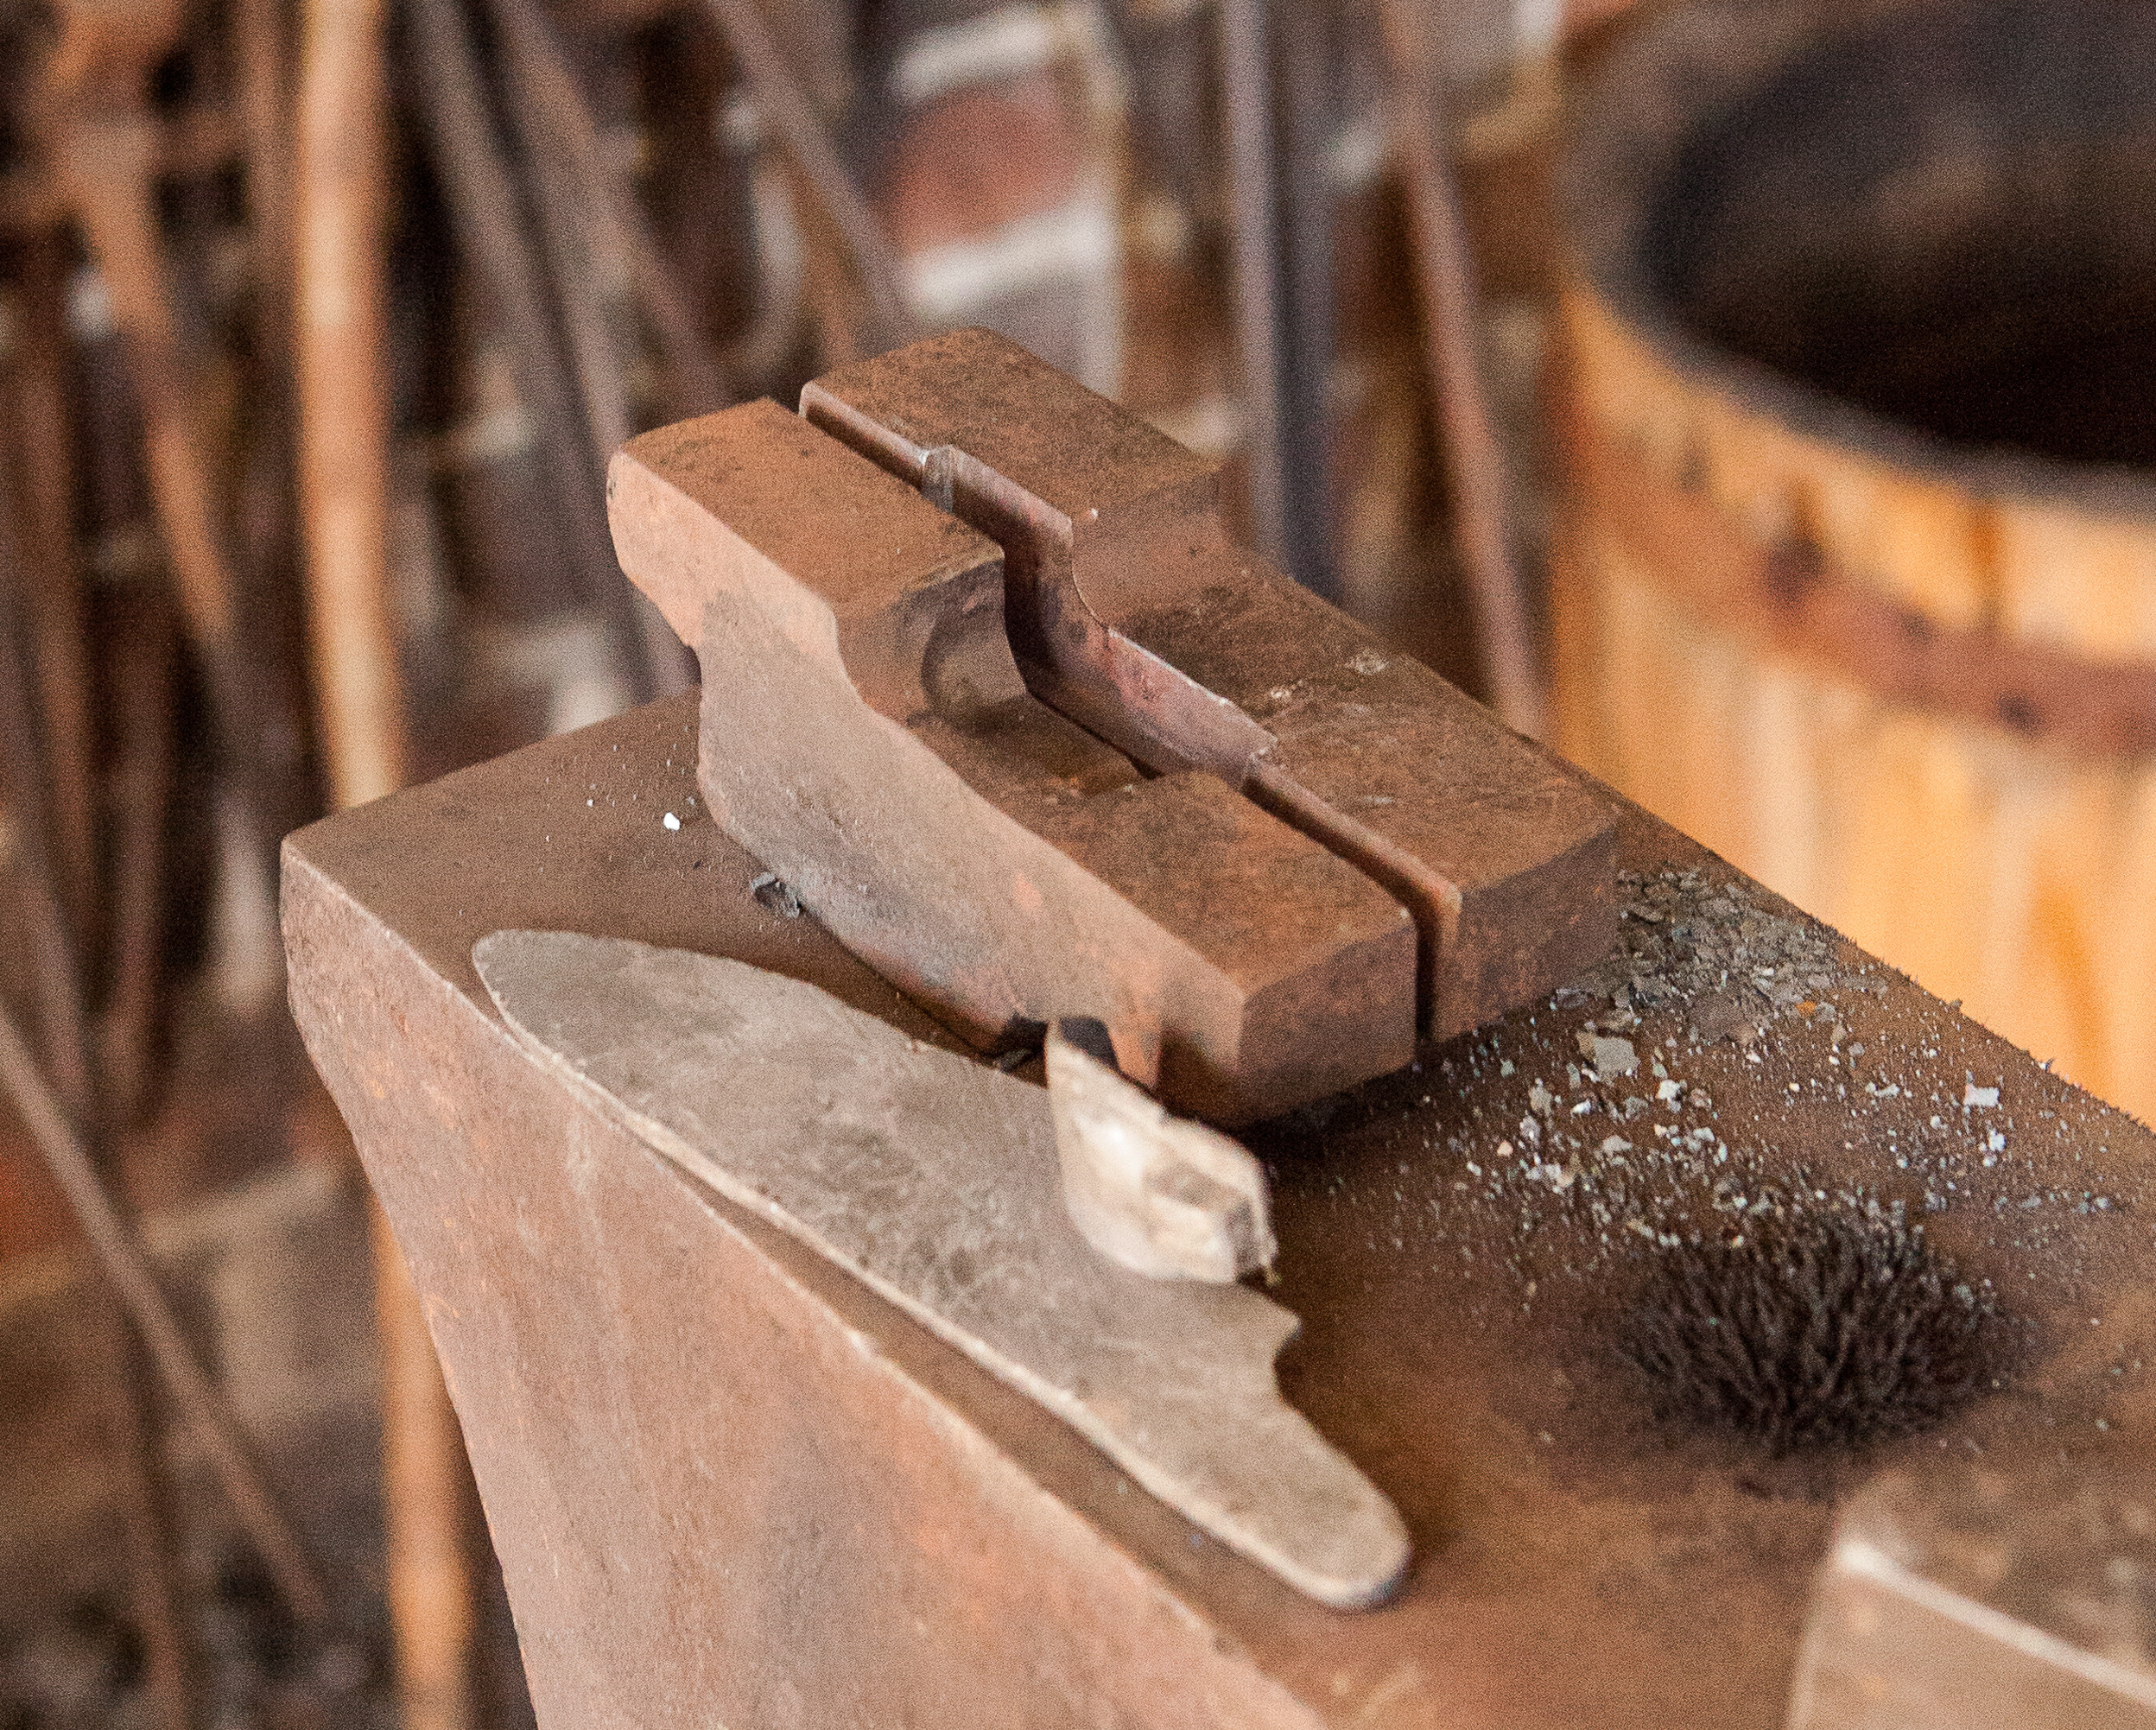
I used the new tumbler die to forge a nearly perfect tumbler blank out of wrought iron. It took a little more time than I had thought, but I got a good result. Since I had not made a period tumbler mill yet, I turned the axles and the parallel tumbler faces on a lathe. I ended up with a roughly shaped disk that I quickly filed to shape to match the original tumbler.
Till later….
Mr. Elliot,
I have forged a dozen or so flintlocks in the past and have just started a new batch I would like to end up with six rifle locks and six pistol locks. Small locks seem to be hard to find so I may make many more to sell. Over the last 40 years I have hammered a tremendous amount ov wrought iron (tons) and many more tons of mild steel. I make all of my internal parts from mild steel and the lock plates flintcocks and frizzens from wrought iron. wrought iron generally gets better with every forge weld so keep all of your drops and scraps to pile weld into new bars. The benefit in making groups of locks is that you learn by repetition and after welding 8 or 9 pans onto lock plates you really get a clear picture of just what to start with and how to go about the proccess. Learn to think like a blacksmith, simple tools and a lot of welding. I don’t even think about frizzens until each lockplate has a tumbler and flintcock installed. I have made some bottom swages that make forged flintcocks very easy and very accurate. I have just stated photo shoots of the tools and will give you a preveiw if you would like. Let me know how your locks come out, I’ll keep an eye on your blog.
Clint, I really appreciate your comments and suggestions. I am doing more and more blacksmithing now that I have a lot of wrought iron to play with. However, a handmade lock is going to have to wait a while, though. I am backed up on paying work. The problem is, I keep getting distracted by these little personal projects. I am not sure there is much point to me making a dozen hand make locks like you, but maybe two at a time. I usually make two of everything else when I make something. There are just too many projects and too little time.
Thanks,
Mark
I am glad I found your site. I am about to take on a similar project in the Bean stile. Where might I find plans or more information on making the lock plate dies?
I don’t know of any plans of lock dies. The dies I have seen and documented on my site are from the Gunshop at Colonial Williamsburg(CW). If you visit, you can ask them to show them to you. The dies I am making are using sheet metal templates that I copied from Volume 1 of the Journal of Historical Armsmaking Technology (JHAT). There is also an article on lockmaking in Volume 5 of JHAT that updates the method for making cocks. Since both articles were written, the Gunshop at CW starting using another die to form the pan rather than forge welding it on.
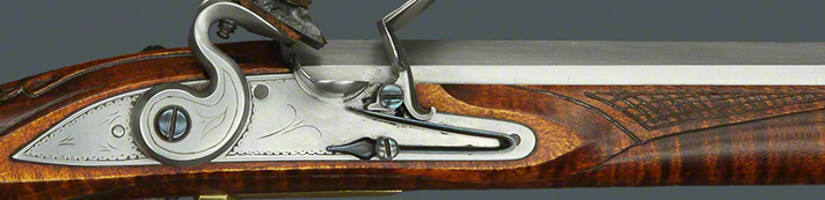
It takes a lot of different skills (not all that I have yet) to make a hand forged lock, and make all the tools needed to make one. I don’t suggest you attempt it unless you are an experienced blacksmith and bench machinist. For a Bean rifle, I highly recommend that you use the Chambers Late Ketland lock. There are photos of at very fine Bean rifle ( )in the Firearms Photography section of my website.
I should note that the templates and other information in the JHAT articles is for making an early English style lock very similar to the Chambers Early Ketland. A Bean rifle would use a late English lock or an early percussion lock. The lock plate and the internals for a late English lock would be different from an early English lock.